• Home
  • Recipes
    • Vegetarian
    • Seafood
    • Snacks
    • Chicken
    • Mutton
    • Egg
    • Roti & Parathas
    • Dessert
    • Sides
    • Soups
    • Salad & Bowls
    • Rice
    • Daal
    • Bakes
    • Roasted
    • Beverages
    • Sauces, Spices & Curry Base
    • Chutney & Dips
    • Festive Recipes
  • Cuisine
    • Bengali
    • Maharashtrian
    • Rajasthan
    • Punjab
    • Chennai
    • Andhra
    • Mangalore
    • Mughlai
    • Kashmiri
    • Chinese
    • Singapore
    • Mexican
    • Continental
    • Italian
    • French
    • American
    • Thai
    • Bangladeshi
    • Arab & Persia
    • North East
  • Meal Type
    • Breakfast
    • Lunch
    • Dinner
    • Snacks
    • Dessert
    • Appetizer
    • Accompaniments
  • How To
    • Preservation Techniques
  • Travel
    • East India
    • West India
    • North India
    • South India
    • Asia
    • America
  • Lifestyle
    • Craft & Creation
    • Experiences
  • Musing
  • Contact
  • Bengali Blogs

Curries & Stories

pinterest facebook twitter instagram tumblr linkedin
Brazilian Lemonade

The mercury has already touched 43 Degrees in Pune from the last few days. It feels like we have been put inside a pressure cooker and getting cooked on dum. Now I know how the poor ingredients might feel when we cook them in a cooker! 

Now a days we are trying trying our hands at new recipes for summer coolers. One of the coolers which caught my fancy from quite sometime now is the Brazilian lemonade or Limeade. After watching about a trillion videos on it I thought of trying it out. It seemed such a easy peasy recipe - just throw in some lime, condensed milk, sugar and water and you are done! Simple enough recipe which comes together in 10 minutes . But there is a small catch - the characteristic of this lemonade is slightly on the bitter side. So if you don't like bitter taste in your drink,  this is not for you. 

Things you can do to reduce bitterness:

  • Many people would show you they just make lime quarters and blend everything with the condensed milk. But that would make your drink very bitter because of the pith. The white part of the lime/ lemon under the skin is called pith and causes bitterness so that has to be removed to reduce the bitter taste.
  • Don't blend for too long, pulse and pause on your blender and repeat.
  • It has to be consumed fresh, the longer it sits the bitter it becomes

This frothy creamy drink is sweet, tart and mildly bitter at the same time. This drink is definitely not everyone's cup of tea no matter how much the videos try to convince you. So if you want to try out something with complex flavors you may try this out.


Preparation Time : 5 minutes 

Making Time : 5 minutes 

Serves - 2 adults

Ingredients :

  • Lemon - 2, cut into wedges
  • Sweetened Condensed Milk (Mithai Mate) - 50 gm
  • Sugar - 1/4 cup (adjust as per taste)
  • Cold Water - 2 cup
  • Ice Cubes 
  • Lemon wedges (for garnish)

Brazilian Lemonade


Procedure :

1. Take out the juice from the lemon wedges in a bowl. Take care that no seeds are there. 

2. Add lemon juice, Cold water and sugar to a blender. Blend it for about 10 seconds on low.

3. Sieve the mixture through a strainer and discard any pulp. 

4.Now transfer the strained liquid into the blender, add the sweetened condensed milk and pulse 2-3 times until frothy.

Pour this drink over a glass full of ice cubes. Garnish with lime wedges and serve immediately 

Other Summer Cooler Recipes:

  • Kokam Juice Recipe 
  • Mango Banana Smoothie
  • Mexican Horchata Recipe
  • Mojito Popsicle 
  • Beetroot Rose Sorbet 

Brazilian Lemonade


Share
Tweet
Share
No comments

Mango Smoothie

31 March

This year has been going super slow in terms of food blogging it seems. I just noticed today that I only have posted 9 blogs in the year so far and already we are at the end of a quarter. Last year this time I had already 20 posts. I have not even done half of it so far and hence this quick post. The workload is frankly quite high and hence the time for social activities has gone down drastically. Plus this summer heat doesn't help either. The more hot and sunny it gets the more I feel my creative juices get into hibernation mode. The light is just too harsh even at early morning to get some good shot even indoors. 

Though I do have a basic studio lighting setup but still I don't feel like dragging all my equipment out when I am already feeling lethargic due to to the weather. So most f the times if you have noticed I prefer shooting in natural light unless there is a deadline to shoot at unholy hours. The point is managing the exposure with this strong sun, is a task in itself. But then lazy people like me still find jugadu ways to navigate the situation. From the time lockdown started I had been shooting with a professional camera and  I tried out shooting in the various light situations across all the rooms in my house. I had read about this suggestion from a professional photographer who had given this important tip to beginners who are starting out on food photography to explore the light in all the available spaces in the house to get a fair enough idea which light at which time of the day works best for which kind of food shots. Like my guest bedroom has a window where I can get the best backlight. Whereas the living room is best to shoot everything with a sidelight. And most of the times I have seen I like the outcomes when I use sidelight. They really accentuate the textures and bring out the colors. 

When I started off, flatlays were my favorite photography angle. One of the main reason was when I had a lot of food in the scene I could accommodate all of them easily in a flatlay and number two reason was I was shooting mainly gravies which most of the time didn't have much of a height element to emphasize. There was a point I felt that I am only food in flatlays and other angles like straight on angle or 25-75 was not meant for me. And I had concluded that without even trying to learn the other angles or composition styles. That is what happens to most beginners, we struggle to find a niche and then don't want to come out of that comfort zone. We give up even before we try and keep repeating the same thing for years instead of exploring new things in which we might even be better. 

Mango Smoothie


After a point I was bored with the same kind of setup. Plus flatlays at times leaves very little to imagination as you expose all the cards or the elements of your composition in the frame. Everything is right there in the frame, very little is hidden away from the sight. Also to fill a frame you need a lot of elements - that was taxing. I had to cook at least 2 sides with a main dish to fill in the gaps in the frame. Too much time went for cooking and very little time left to setup the frame and think about a good composition. When I say good composition - I mean a frame which might tell a story, which my give you some fodder for thoughts, or have a technicality which might pique the interest of the audience. At that time I was just shooting flat frames with just the food. 

So I started spending some time on Instagram to look for inspirations. I found that Indonesian and Middle eastern food photographers did wonderful creative food frame which left you looking at the frame for long thinking who did they manage to get a certain effect. I am not saying the European or American food photographers are bad, but the aesthetics brought on the table (literally) by the Indonesian photographers appealed to my taste. The way they used the light, the way they brought in traditional utensils or local produces and created a rustic looking frame was simply mind blowing for me. I did notice they give a lot of importance to tiny nuances in the frame like a speck of chilli or a pod of garlic etc. and it was definitely not a minimalist frame. But the main takeaway was, creating moody frames aesthetically. 

I keep looking for such kind of inspiration everyday and anytime anything catches my fancy I save it or bookmark it. While I cannot say I am an expert photographer now, I have certainly come a long way from 2020. I can confidently say, now I understand a few things better than what I did when I started off and it definitely makes me happy. Even if its a delta growth I feel happy. Checkout for behind the scene for this particular frame on my Instagram feed to see how this shot was setup.

Today morning as I was making my breakfast I thought of shooting it as well. I think I had mentioned in a previous blog that I was turning to healthy food options slowly. Most of the days my morning breakfast is different king of smoothies. They are so easy to make that you don't even need to put your mind into making one. Just throw in the ingredients and blend. Some days I add nuts or chia seeds to make things a little interesting. I feel smoothies get a robust texture and and nice body when you add banana to it along with any other fruit of your choice. Moreover bananas add a natural sweetness to the smoothies as well. More than a pure Mango smoothie I like the taste of the combination of mango and banana. Try it once if you haven't yet. 

And if you think smoothies are the most boring things to start your day with, nothing can be far form truth. I know because I was also one of those people who didn't get excited at the thought of smoothies first thing in the morning. The first small step was to convince myself to start my day with something healthy and have controlled portion of food throughout the day. Having smoothies for breakfast is a great way to portion control and yet have a filling breakfast. The banana in the smoothie helps keep you full for a long time till lunch so that you don't feel any mid morning hunger pangs. Also a small tip is to replace sugar with honey, it helps loose weight over a period of time. This is a really really simple recipe and I will put some other smoothie recipe soon. 

Soaking Time : 10 minutes
Preparation Time : 5 minutes

Serves - 1

Ingredients :
  • Ripe Mango Chunks - 1/2 cup 
  • Banana - 1
  • Milk - 200 ml
  • Honey/ Sugar - 2 tsp or as per taste 
Ingredients for garnish:
  • Chia Seeds - 1 tsp
Equipment:
  • Blender
Procedure: 

1.  Soak the chia seeds in 3 tbsp of water for about 10 minutes.

2. Add all the ingredients - milk, banana, mango and honey in high-powered blender.

Note: I prefer to have cold smoothie hence I use chilled milk but you can use room temperature milk too.

3. Blend for 1-2 minutes until you get a smooth and creamy texture.

Note: Color will depend on the quality of the Mango used

4. Pour into serving glasses. Top it off with soaked chia seeds. Enjoy!

Mango Smoothie


Share
Tweet
Share
No comments

Horchata recipe


16 March

Its almost Holi. This year probably we can expect the Holi scene to be very similar to pre pandemic days. When we speak of Holi can we not talk about some refreshing drinks to cool us off after all that playing in the sun? The usual Holi recipes would call out for Thandai, Kanji, Mojitos and all the known suspects. But why not try a different cooler this time? Something very creamy, delicious and refreshing? Something which doesn't involve nuts, especially with people like me who doesn't really have a liking towards nuts, will absolutely enjoy this drink. 

Till now the only Mexican thing most of our subcontinent is aware is nachos or burritos. But Mexican cuisine has a lot of different things to offer. They are so similar like the Indian cuisine and yet very different. In fact when I was living in States, whenever I missed a good rice meal, I would head over to Chipotle ( a famous Mexican fast food chain) instead of any Indian restaurant (because the kind of Indian dishes served over there is not exactly what appeals to my palate) and gorge on the scrumptious burrito bowl. It is my most favorite meal till date! Also you might not be aware but some Mexican drinks are really amazing. 

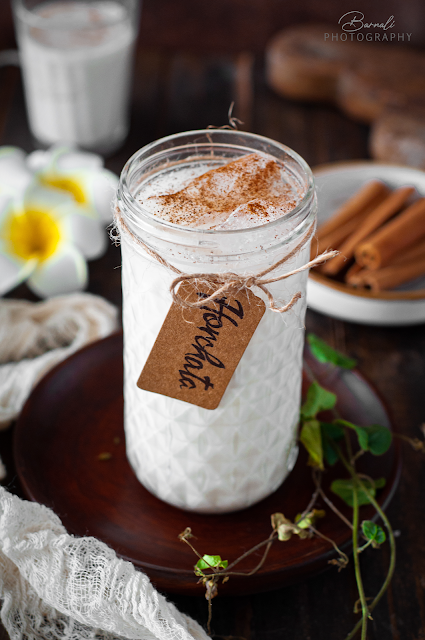
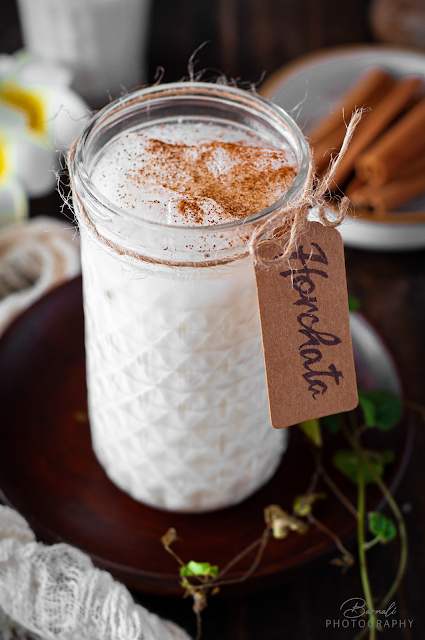
Horchata recipe


When I was staying in San Diego, we visited the border town of Tijuana, Mexico. It was such a thrill that we were crossing borders to reach a different country. We had taken a city tour ticket and the conductor dropped us at a designated spot, dishing out many statutory warnings like 'don't buy silver, people will swindle you here', 'be cautious when you are crossing roads' etc. etc. To the point that it almost sounded scary. Me and my roommate skeptically set out to explore the area while all the warnings still ringing in our ears loud and clear. Maybe we looked like a couple of teenagers (we always got that wherever we went!) so no one thought we would be having enough money to buy silver! Thus we weren't approached by any so called swindlers. Tijuana appeared a very lively place. Whenever we were walking past the restaurants we smelled some heavenly aroma coming from inside. There was lots of music playing everywhere. It was in one such restaurant we got to taste Horchata for the first time. Back then I wasn't such a food connoisseur. So I didn't make out much form the drink apart form the fact that it tasted awesome and had a beautiful rich cinnamony aroma which lingered on the tongue. We left Tijuana that day but the taste of Horchata remained with us for quite long. 

Fast forward many years after that, I had completely forgotten about that experience. A few weeks ago  Facebook threw me a notification of photos from the Mexican trip and that's when I remembered about this unique drink from Mexico. I just had to revive that memory so I got down to work of gathering all the essentials. The key to this recipe is soaking the rice and cinnamon for almost 5-8 hours or better overnight. It helps develop the flavors nicely. So you need to be a little patient to enjoy this drink. There can be a good number of variation with the base recipe and I think I will be trying them out this summer and posting on my blog. So stay tuned on that.

Horchata (pronounced or-chah-tah) is a popular Mexican drink that is often described as a sweet rice milk beverage. One would find this drink at most Mexican restaurants in the United States and abroad. Mexican food is usually spicy and this refreshing drink helps to balance out the heat from those dishes. This recipe has several different adaptations depending on where you are drinking it. Mexican versions are usually made from rice, while the Spanish kind uses tiger nuts. 

Some additional trivia : The Mexican horchata dates back to the 16th century, but there are even older versions. In fact, the term "horchata" describes a group of related drinks with roots in ancient Rome and North Africa. The Romans' version was not based on rice or nuts, but on barley, which for a time was believed to possess curative properties. The Romans "milked" dried barley in water to form the basis for the drink they called "hordeata," which literally means "drink made from barley". As both the Roman and North African versions of horchata de chufa made their way around Europe, different cultures adapted the horchata using different grains, nuts, and seeds. 

Horchata is a simple yet satisfying drink on a hot summer day. So lets get to the recipe now.

Horchata recipe


  • Can you add nuts?
  • Yes you can. Almond compliments the best. For this recipe you can add 1/4th cup of almonds.
  • Can it be made dairy free?
  • Yes you can. Replace whole milk with canned coconut milk or non-dairy milk such as almond milk.
  • Which Rice can I use?
  • Avoid glutenous rice in this recipe (e.g Indrayani). Use long grain rice like Basmati or some fragrant rice like Ambemohar, Gobindobhog etc. They impart a nice floral smell.
  • How long can you keep Horchata?
  • The horchata base will stay nice in the fridge for up to 3 days. Don't leave it at room temperature. Always refrigerate.
  • What are the different sweeteners you can use?
  • You can use sugar, condensed milk, honey, maple syrup etc. can be used. Stevia can be used for a sugar free option. Adjust the sweetness level as per your liking. 
  • Any Serving suggestions?
  • This drink tastes divine when served on the rocks. Chill the Horchata in the refrigerator for an hour and then fill up a glass with ice cubes. Pour the horchata over ice and garnish with a sprinkle of cinnamon powder or cinnamon sticks. 


Preparation Time : 15 minutes
Resting Time: minimum 5 hours or overnight

Serves - 2 serving

Ingredients :
  • Uncooked white rice (Ambemohar/ Gobindobhog/ Jasmine/ Basmati etc.) - 1/2 cup
  • Cinnamon Sticks - 3 to 4 (2 inch sticks)
  • Water - 2 cup
  • Condense Milk - 200ml
  • Vanilla Essence - 1 tsp
  • Milk - 100 ml (or as required)

Ingredients for serving:
  • Ice Cubes 
  • Ground Cinnamon Powder
Equipment:
  • Blender
  • Mixing Bowl
  • Spoon
  • Strainer & Cheesecloth

Procedure: 

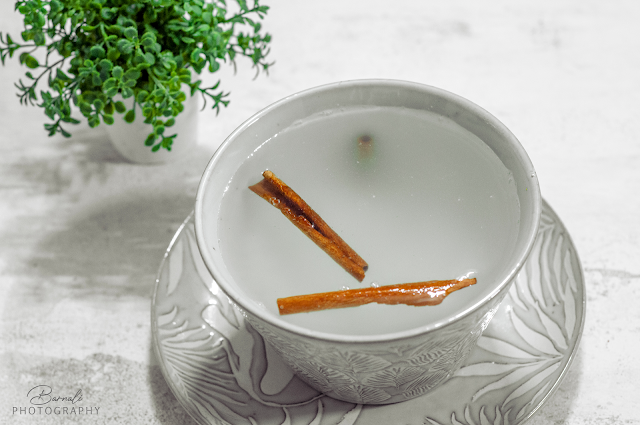
1.  Add rice, cinnamon sticks and water to a mixing bowl. Let soak at room temperature for about 2 hours, then transfer to the refrigerator overnight until the rice softens and the cinnamon stick is soft enough to break into smaller pieces.

Note: Some people recommend slightly blitzing the mixture in a blender just enough to break up the rice and then soak it overnight. I did not do this.

Horchata recipe

2. After 8 hours or the next day, transfer the cold rice mixture to a high-powered blender and blend to combine. Blend about 30 - 60 seconds on high speed or until finely pulverized, stopping occasionally and shaking blender if mixture sticks to the bottom. I blended it for about a minute in total. 

3. Now strain this mixture with a cheesecloth lined fine-weave mesh strainer. When finished, discard the remaining solids in the strainer and transfer the strained liquid to a pitcher or big container. This is the Horchata Base.

Horchata
Horchata Base after straining

4. Now add the vanilla essence, milk and condensed milk. The condensed milk will give it sweetness as well as a thick consistency. Add the condensed milk as per your taste. For me I added 200 ml of condensed milk for this recipe for optimum sweetness.

Tip: You can also make this without condensed milk. Just add full cream milk to the consistency you want and add sugar or any preferred sweetener along with it.

5. Mix all the things together nicely, making sure the condensed milk is well incorporated.

Tip: You can also blitz this mixture for 20 seconds in a blender to achieve the final consistency quickly.

6. Now transfer this drink to the refrigerator for a couple of hours before serving or until it is chilled.

Serve it in a glass filled with ice cubes. Garnish with cinnamon sticks or cinnamon powder. Enjoy!

Horchata


Share
Tweet
Share
No comments


3rd October

We are finally into October! Mahalaya is just around the corner which means its time for Durga Puja! And Durga Puja definitely means grabbing on a lot of good food. So to prepare yourself for this festive season it is always recommended to keep a healthy detox drink as part of your regular diet plan. 

Hence I am starting October on a healthy note by sharing a favorite detox drink - Kokam juice. This tarty and citrusy fruit is a  favorite among the Konkans and is widely available in the Malabar regions of India. You can find many dishes like dal and curries being made with Kokum in Maharashtra.

My tryst with Kokum started with Sol kadi - a flavorful concoction of Kokum, water, coconut milt, ginger and green chili. Its a lovely summer drink here in Maharashtra and I absolutely love it with a fish curry thali specifically. Slowly I started exploring and knowing more amount this amazing fruit and what all you can do with this little wonder fruit. 

Kokum comes with an array of known health benefits. The presence of vitamin C helps boost immunity,  the garcinol it contains has antioxidant, anti-inflammatory, and anti-allergenic properties. But what has brought kokum into the spotlight is the presence of hydroxyl citric acid (HCA) in it, which is said to shrink appetite and reduce fat in the body, further helping you lose weight, the healthy way. It has become a new fad to include Kokum juice in your regular diet for healthy weight loss. You must have also heard some Bollywood celebs taking about Kokum drink as their preferred post workout drink.

Kokum juice or kokum sharbat will not only cool you down your body but also help detoxify your body. You can include this in your early morning routine and it will work wonders for you. The recipe is also very simple, you can just create the Kokum Juice paste in advance and use it to prepare your detox drink anytime you want. I am sharing two recipes with Kokum below. Check them out below.


Soaking Time: 1-2 Hr
Preparation Time : 5 minutes 
Cooking Time : 5 minutes
Serves - 3 glasses

Ingredients :
  • Dry Kokum - 1/2 cup
  • Water - 1 cup
  • Ground Roasted Whole Jeera (Cumin) - 1 tsp
  • Black Salt/ Rock salt - 1/2 tsp 
  • Sugar - 4 tbsp ( adjust as per taste)

Equipment:
  • Vessel
  • Strainer
  • Masher

Kokum Juice : Method

1. Soak some kokum in water and remove the seeds.

2. After 1-2 hours of soaking, strain the water and keep aside the water.

3. Now in a mixer grinder, take the soaked kokum and add half of the water. Make a smooth paste.

4.  Dry roast some cumin seeds. Roughly pound the roasted cumin seeds it in a mortar pestle. Keep this ground roasted cumin seed aside.

4. Take a pan, add the remaining kokum water and add the sugar. Cook on low heat for 5 minutes till the sugar melts. 

5. Now add the Kokum paste to this water. Give it a good stir. Cook for 5 more minutes and bring it to a boil.

6. Now let the mixture cool. Once the mixture has cooled strain it. 

7. Now add the roasted cumin seed powder and salt to this and give a nice stir. Your Kokum juice paste is ready. Store it in a jar. You can refrigerate it for a week.

To make the juice, take 2 tbsp of the pulp and add chilled water to it and give a nice stir. Add a few ice cubes and a sprinkle of ground roasted cumin seeds. It is best served chilled.


Kokum Water : Method

1. Soak a handful of kokum in water overnight. Strain out the water next morning and drink it by warming up a bit. Add a little seasoning of your choice. You can store this water for later usage as well. 

Note: You can use the soaked Kokums to prepare the Juice paste as detailed above.


Share
Tweet
Share
No comments


Chamomile Tea

8 August 

The last week ended on a little melancholous note, we bid a final adieu to a close friend who has now become a star in the sky. I didn't mention about this earlier as we were a all quite shaken from the suddenness of the news. A beautiful soul gone too soon but now in hindsight I feel, we will always cherish her as a wonderful person who really was elemental in bringing together some strangers and making us the best buddies before she went. She is now living in a much more peaceful zone and I wish her all the happiness. The day that followed also came with a glitch. I pulled a muscle along my rib line and it is not a very pleasant thing to live with the painful feeling from last couple of days. I direly needed something to sooth my nerves and feel a little better. The tisane I had recently got came to the rescue in a heroic manner I must say.

Herbal teas—less commonly but more properly called tisanes —are beverages made from the infusion or decoction of herbs, spices, or other plant material in hot water. They are infusions made from leaves, bark, roots, berries, seeds, and spices. Common tisanes include mint, chamomile, verbena, and rooibos. White, green, oolong, black teas come from the leaves of the Camellia sinensis plant, which has caffeine. Interestingly on the other hand, tisanes, steep parts of other plants in water to produce a flavored, hot drink, and most are caffeine-free.

Chamomile Tea

Now Herbal tea is not something which has suddenly come into existence due to elevated sense of health consciousness now a days. It existed in several forms in old times as well. References of Herbal teas can be found in famous fictions as well. For an example, if you have read Agatha Christie’s novels then you will undoubtedly know the famous Belgian private detective Hercule Poirot is! He is a highly intelligent person with an amazing understanding of the criminal mind. As per the author, Hercule was not a lover of traditional tea, but preferred to drink the herbal variety. His favorite was chamomile based which allowed him to relax and would let his little grey cells work for him.

Chamomile Tea

I think this is where I resonate with Hercule! No seriously. I have had the luxury of tasting different tea blends especially in the past few years, courtesy to one of my close friend. And I can undoubtedly say that Chamomile tea has been a constant favorite tisane after a rose tea blend. I love the soothing aroma. It has in real a nerve calming effect.

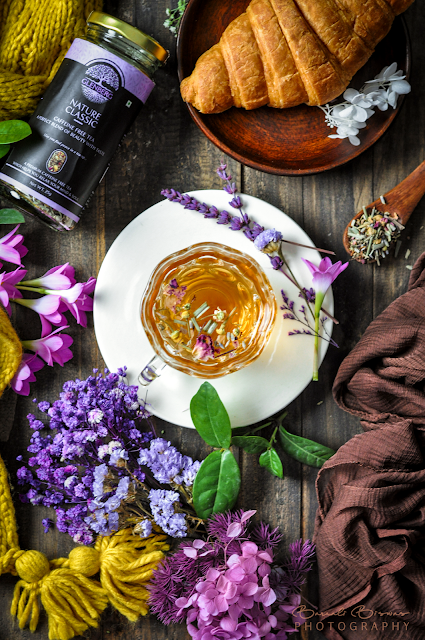
So when Glenberg Organics asked me to sample any tisane form their wonderful range I didn't take a while to decide my favorite pick - the Natures Classic. By the way this is not a sponsored post so I do mean every word of praise I am about to pen down. It has Chamomile, hibiscus, rose and lavender that has anti inflammatory characteristics and helps in having a healthy gut. It comes in a pretty 25 gm jar and will soon become your jar of happiness. When I got it first I was a little skeptic to be honest, as not all tisane experience has been good for me. But the first time I made it and took in the beautiful soothing aroma, I was happy with the product. After the taste test I can give it a good thumbs up for creating a light and lovely blend. It is a little pricy but every penny is worth the tea experience that you are going to have! The Glenberg Organics tisanes are easily available in Amazon. You can also checkout their Instagram page for more updates.

Chamomile Tea Tisane

This is one of my most favorite shoots in recent time so this blog post is going to have a lot many photos than usual. Actually tea is something where only photos should speak and we should just sit back and enjoy each frame. 

There are a lot of firsts in this shoot - first experience of shooting a floral frame, first professional photoshoot for a tea brand, first time did the moody editing in lightroom (and totally loved it), first time had a wonderful tisane and many more such small firsts. I have recently started maintaining a journal to pen down daily learnings. I call it "Lets upgrade myself" and the objective is that by the time the year ends I would make myself a better version of myself on many aspects than I was a year ago. Some of these firsts would definitely find a place in that journal. And all those who are reading my blog right now, believe me however lame it may sound to keep a journal, when you read back all your doings and achievements at the end of the year, it doesn't sound lame anymore, you can actually see how much you grew in a year. I really didn't have any faith in journaling before but during lockdown I started a random journal just to have some peace of mind and now when I read about all those snippets it makes me relive all those moments lost in time. Give it a try sometime and you wont regret. 

Chamomile Tea Tisane

There is really no elaborate process to this tea. But still I recommend a few ways to make it. The first process is with pure tisane steeped in water. And the second process is tisane with a mix of CTC tea to give it more body and a little tea-ness. The second way is my favorite. Do check out both and let me know which one you like better.

Chamomile tea


Standard Process

Preparation Time : 5 minutes
Steeping Time :  4 - 5  minutes
Temperature : 90 Degrees

Ingredients :
  • Glenberg Organic Natures Classic - 1/4 tsp or 2 gm
  • Honey - as per taste
  • Water -  200 ml
Equipment:
  • Milk Pan 
  • Strainer

Procedure: 

1.  Take a pan with 200 ml water and let it heat to 90 Degrees.

2. Now add 2 gm of Natures Classic tea

3. Let it steep for 4-5 minutes for the flavors to come out.

4. Pour honey in your tea cup. Now strain the steeped tea in the cup, give it a stir and enjoy!

Note: You can enjoy the tea without any sweetener as well.


My Favorite Process

I like this process better because it gives the goodness of both a real tea and a tisane. And especially if you like a little color in your tea then this is the best way to go.

Preparation Time : 3 minutes
Steeping Time :  2 - 3 minutes
Temperature : 100 Degrees

Ingredients :
  • Glenberg Organic Natures Classic - 1/4 tsp or 2 gm
  • Any CTC Tea - 1 tsp ( I prefer Society Tea)
  • Honey - as per taste
  • Water -  200 ml
Equipment:
  • Milk Pan 
  • Strainer

Procedure: 

1.  Heat 200 ml water in a pot till it comes to a boil. 

2. Add CTC tea and let it boil for about a minute. 

3. Add 2 gm of Natures Classic tea and switch off the flame. 

4. Let it steep for about 3 minutes

5. Pour honey in your tea cup. Now strain the steeped tea in the cup, give it a stir and enjoy!

Note: You can enjoy the tea without any sweetener as well.

Chamomile Tea


Share
Tweet
Share
1 comments

Beetroot Sorbet

2 August 

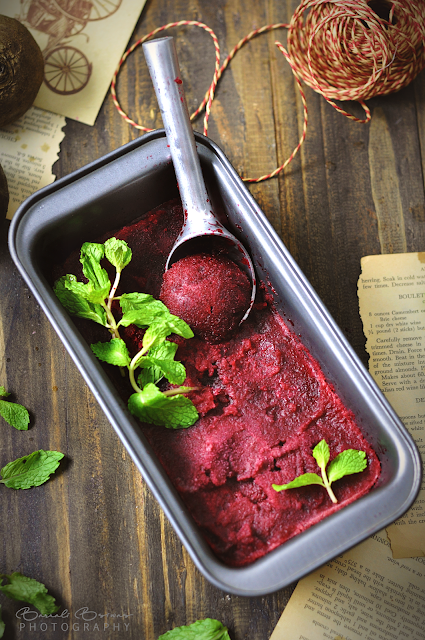
I know summers are long gone and it has already started to pour in many places in the country and yet here I am posting a summer special sorbet. Well I feel that you enjoy cold treats better in cold weather ( with all necessary protection for your health of course). Especially when you want to have something sweet, these frozen treats are best.  If you are wondering what sorbet is, it is a frozen dessert which is typically made with some kind of fruit juice and/or puréed fruit, plus a sweetener (usually sugar), along with other flavoring ingredients.

Recently I got the Kitchenif Ice cream maker machine and was eager to try it out. Seems like a machine is supposed to make your life easier which it does but then to get the best out of your ice cream maker I would really recommend all reader to go through the manual that comes with your ice cream maker a couple of times so that you know what are the proportions with which you can work in the ice cream maker. The first few tries might not yield successful results but then keep trying and try to stick to the measurements and temperatures and the quality of the ingredients mentioned in the manual. You can actually start with simple ingredients and move to improvisations as you understand the working principles. 

The process of churning is really hassle free in the Kitchenif gadget. Just pour in the sorbet mixture and sit back for the stipulated time (20-25 minutes) and your sorbet would be ready in no time. This one got done in approximately 25 minutes after which I froze it for 3-4 hours before enjoying it. Kitchenif provides a detailed user manual and a lot of recipe to start with. Next I plan to make some creamy ice cream with this machine.

Before making this I was wondering how to neutralize the earthy natural smell of beetroot. People like my mom who absolutely love having beet might not feel it is a problem. But I am not so fond of that smell especially in a dessert. Vanilla was an option but I felt it wouldn't compliment beet or rather it might overpower the natural taste. Rose was the very next choice. The color red would feel familiar to a red rose so to flavor the sorbet with Rose sounded like a plan in my head. If you want to add a milk rose fragrance to any sorbet I would recommend using rose water instead of a rose essence, as the former is a little mild on the senses.

Beetroot Sorbet


The combination tasted lovely. Rose actually gelled pretty well with beetroot sorbet. There is one word of caution while you make beetroot sorbet, please pass the puree through a strainer. You might love pulpy pieces of fruit in your sorbet, but beetroot pulp doesn't feel so good on the palate, this is my experience. But you can always take your pick - pulpy or no pulpy. To me the smooth texture feels more interesting.

Also remember sugar plays a vital role in the sorbet's texture. Too little and it will be icy, too much and it will become slushy. There is a simple egg test for this which is mentioned in the booklet. Wash and dry a fresh egg and gently lower it into the puree. You should see only 1/4th of the egg floating above the surface to get the right consistency. If less is visible or the egg sinks then add more sugar. If more is visible then add a little more water.

Beetroot Sorbet


Preparation Time: 15  minutes
Cooking Time : 15 minutes
Churning Time : 20-25 minutes
Freezing Time: 3-4 hours
Serves - 4 -5 medium scoops

Ingredients :
  • Beetroot - 1 big (washed, peeled and cubed) about 1 cup pulp
  • Rose water - 2 tsp
  • Sugar - 1/2 cup
  • Water - 2 cup
  • Lemon - 1/2 
Equipment:
  • Ice Cream Maker
  • Fruit Juice Strainer
  • Mixer Grinder
  • Pan
  • Freezer Safe tray


Method
1. Puree the beetroot cubes with water till you get a smooth consistency. Now strain the mixture to remove all the coarse particles. This will ensure a smooth texture in the sorbet.

2. On medium heat combine the beetroot mixture and sugar in a pan. Keep stirring often as it comes to a rolling boil. Continue boiling till the raw smell is gone.

3. You might see a lot of foam forming on the top as the mixture boils, skim it with a spoon as they form. Finally you will get the clear liquid only.

Beetroot Sorbet


4. Now allow the mixture to come to room temperature. Add the rose water and the lemon juice. Stir well. 

Tip: Lemon juice will enhance the taste

5. Refrigerate the mixture until chilled for about 2 - 3 hours

6. Get your ice cream maker ready as per the user manual ( freeze the container for 12-15 hours). Start the machine and then pour the beet mixture through the inlet hole slowly. Churn the sorbet for about 20-25 minutes. At this stage it will be in a soft serve state. You can have it immediately.

7. Or you can transfer the sorbet to a freezer safe tray and freeze it for a couple of hours to get a more firm texture.

Before serving take the sorbet out of the freezer and let it thaw a bit. Scoop and serve with a garnish of mint leaves.

Beetroot Sorbet


Share
Tweet
Share
No comments
Older Posts

About me

I am a software engineer by profession and a writer at heart. Born and brought up in Kharagpur, I moved to the city of dreams Mumbai when I got my first job. Till then I had not cooked a single dish in my life. Not even Maggi or tea. My dad had a strong belief that his little princess never will be in a situation where she had to cook for herself. Hence I was not allowed to spend time in the kitchen till I was studying.


So when I faced the daunting task of living alone, dabbas came to initial rescue. After that I managed a whole year on just boiled vegetables and rice. And then I landed in US. The bounty of fresh produce and cooking ingredients available in the super marts eventually lured me into making my very first meal ever. There was no turning back after that. I finally discovered how much I was in love with cooking and being creative in the kitchen.


This blog is a humble attempt to present our culinary heritage to one and all and document some of the very traditional recipes which gets passed on through generations just by word of mouth.


So just sit back with a cup of tea or coffee and enjoy the curries and the stories related to each.


Follow Us

Footprints

Blog Archive

  • ▼  2026 (4)
    • ▼  May (1)
      • A Suitcase Full of Stories: My Heartfelt Shopping ...
    • ►  January (3)
  • ►  2025 (3)
    • ►  December (1)
    • ►  June (1)
    • ►  February (1)
  • ►  2024 (21)
    • ►  December (2)
    • ►  September (1)
    • ►  August (3)
    • ►  July (4)
    • ►  May (2)
    • ►  April (5)
    • ►  March (3)
    • ►  January (1)
  • ►  2023 (7)
    • ►  December (2)
    • ►  November (1)
    • ►  October (1)
    • ►  May (1)
    • ►  March (1)
    • ►  January (1)
  • ►  2022 (18)
    • ►  September (1)
    • ►  August (2)
    • ►  July (2)
    • ►  June (3)
    • ►  April (1)
    • ►  March (3)
    • ►  February (2)
    • ►  January (4)
  • ►  2021 (60)
    • ►  December (5)
    • ►  October (5)
    • ►  September (5)
    • ►  August (7)
    • ►  July (6)
    • ►  June (5)
    • ►  May (3)
    • ►  April (4)
    • ►  March (6)
    • ►  February (6)
    • ►  January (8)
  • ►  2020 (55)
    • ►  December (5)
    • ►  November (3)
    • ►  October (10)
    • ►  September (7)
    • ►  August (7)
    • ►  July (9)
    • ►  June (3)
    • ►  May (9)
    • ►  March (1)
    • ►  January (1)
  • ►  2019 (3)
    • ►  November (1)
    • ►  April (1)
    • ►  January (1)
  • ►  2018 (1)
    • ►  December (1)
  • ►  2017 (4)
    • ►  December (2)
    • ►  November (1)
    • ►  September (1)
  • ►  2016 (10)
    • ►  August (1)
    • ►  July (2)
    • ►  June (5)
    • ►  April (1)
    • ►  March (1)
  • ►  2015 (10)
    • ►  December (1)
    • ►  August (1)
    • ►  June (1)
    • ►  May (2)
    • ►  April (4)
    • ►  March (1)
  • ►  2014 (22)
    • ►  November (2)
    • ►  August (2)
    • ►  July (3)
    • ►  June (2)
    • ►  May (4)
    • ►  April (3)
    • ►  January (6)
  • ►  2013 (22)
    • ►  November (2)
    • ►  October (4)
    • ►  September (5)
    • ►  August (2)
    • ►  July (1)
    • ►  June (1)
    • ►  May (2)
    • ►  April (1)
    • ►  March (1)
    • ►  February (2)
    • ►  January (1)
  • ►  2012 (31)
    • ►  December (4)
    • ►  October (3)
    • ►  September (8)
    • ►  July (1)
    • ►  June (1)
    • ►  May (14)
  • ►  2010 (9)
    • ►  July (3)
    • ►  June (2)
    • ►  April (1)
    • ►  March (2)
    • ►  February (1)
  • ►  2009 (4)
    • ►  February (2)
    • ►  January (2)

recent posts

Pinterest Board

Popular Posts

  • Champaran Mutton / Ahuna Mutton - A Bihari Delicacy
      When I finish a long week of work, self doubt, frustration of dealing with people and finally when the weekend comes, I feel cooking somet...
  • Kochur Dum / Kochur Dalna / Arbi Masala/ Taro or Colocasia Curry
    August 19 Kochu or taro is one of my favorite vegetables. It is as versatile as potato only much more tasty. It is equally starchy an...
  • Tetor Macher Jhol (Bitter Gourd Fish Curry)
    Anything Bitter hardly finds takers. Same applies for Bitter Gourd. As a kid I hated bitter gourd in any form. Grown ups around me would...
  • Khandeshi Kala Masala - Kala Mutton Masala
      25 September Maharashtra is a land of unique local flavours. And still it is mainly known for its Vada Pavs, poha, pav bhaji and modaks. I...
  • Macher Bhorta | Fish Bharta | Mach Makha| Bengali Style Mashed Fish
      October 18 Bhortas or bharta as we call it in pan India, are the quintessential Bengali food, a staple in Bangladeshi cuisine. They are th...
  • Complete Details to plan your ISKON Mayapur Visit
    Radha Madhav during Pushya Abhishek on 6th Jan 2023 First of all wish you a very happy new year. I have been away from blogging for a while ...
  • Varhadi Mutton - A Traditional Vidharba Cuisine
    Varhadi is a dialect of Marathi typically spoken in Vidarbha region of Maharashtra. Vidarbha is the north-eastern region of Maharashtra ...
  • Dim Toast | Egg Toast | Dim Pauruti | Savoury French Toast
      April 25 Calcutta or Kolkata. A city known for its food and culture, where hospitality and love are synonymous with lip-smacking grub. Cho...
  • Golda Chingri Malaikari (Giant River prawns in coconut milk gravy)
    One of the main reasons I love Kolkata is because of the fish we get here. Its so fresh and one can get restaurant grade fish quality even i...
  • Pahadi Bhatt Ki Daal | Black Soyabean Dal
      Happy 76th Independence Day to all my readers! Today we are celebrating 75 years of independence and that is such a remarkable thing. the ...

Liebster Award

Liebster Award

Very Good Recipes

Very Good Recipes

You can find my recipes on Very Good Recipes

Contact Us

Name

Email *

Message *

Pages

  • Travelogue Index
  • VEGETARIAN RECIPE
  • CHICKEN RECIPES
  • SEAFOOD RECIPES
  • MUTTON RECIPES
  • RICE RECIPES
  • EGG RECIPES
  • DAAL RECIPES
  • ROTI & PARATHA RECIPES
  • BAKING RECIPES
  • SWEET RECIPES
  • SNACKS RECIPES
  • SIDES RECIPES
  • SOUP RECIPES
  • SALAD & BOWLS RECIPES
  • ROASTED RECIPIES
  • JAM & PRESERVE RECIPES
  • BEVERAGE RECIPES
  • SAUCES, SPICES & CURRY BASE RECIPES
  • CHUTNEY & DIPS RECIPES
  • FESTIVE RECIPES
  • Contact Us
  • TRAVELOGUES OF EAST INDIA
  • TRAVELOGUES OF WEST INDIA
  • TRAVELOGUES OF SOUTH INDIA
  • TRAVELOGUES OF NORTH INDIA
  • TRAVELOGUES of ASIA
  • North East Recipe

This Blog is protected by DMCA.com

DMCA.com for Blogger blogs
FOLLOW ME @INSTAGRAM

Curries n Stories © 2020 All rights reserved.
Created with by BeautyTemplates