• Home
  • Recipes
    • Vegetarian
    • Seafood
    • Snacks
    • Chicken
    • Mutton
    • Egg
    • Roti & Parathas
    • Dessert
    • Sides
    • Soups
    • Salad & Bowls
    • Rice
    • Daal
    • Bakes
    • Roasted
    • Beverages
    • Sauces, Spices & Curry Base
    • Chutney & Dips
    • Festive Recipes
  • Cuisine
    • Bengali
    • Maharashtrian
    • Rajasthan
    • Punjab
    • Chennai
    • Andhra
    • Mangalore
    • Mughlai
    • Kashmiri
    • Chinese
    • Singapore
    • Mexican
    • Continental
    • Italian
    • French
    • American
    • Thai
    • Bangladeshi
    • Arab & Persia
    • North East
  • Meal Type
    • Breakfast
    • Lunch
    • Dinner
    • Snacks
    • Dessert
    • Appetizer
    • Accompaniments
  • How To
    • Preservation Techniques
  • Travel
    • East India
    • West India
    • North India
    • South India
    • Asia
    • America
  • Lifestyle
    • Craft & Creation
    • Experiences
  • Musing
  • Contact
  • Bengali Blogs

Curries & Stories

pinterest facebook twitter instagram tumblr linkedin


Day 77 of Lockdown 5.0 and Day 9 of Unlock 1.0

The weather has turned very monsoony. I know that is not a genuine word, but when you see these lovely rain laden clouds float by your balcony, you don't feel like sticking by any grammar rules. Your heart just kind of gets into a romantic mood.

The vista in front of my home is getting surreal by the day. Though  officially monsoon is stated to enter Maharashtra by weekend, the sky feels like monsoon is already here. See the below images and you will know what I am talking about. I am one of those still fortunate to have this view from my balcony even after living in the city, or I may say fringes of the city. So it may be a bit far away form the heart of Pune, but each day when I used to come back home from office before lockdown I used to feel like this view is every bit worth the travel time.

I wake up to birds chirping outside my window. I hear the breeze blowing through the mango grooves below. I can see the clouds making different formations all the time. And yeah on a clear full moon night I stand in the balcony for hours admiring the play of the moon and the clouds. I cant tell you how surreal it feels at that moment. You need to be here to witness and experience it, only then you might get an idea of what I am talking about.


The base recipe is that of my mom's. She used to make this all the time with prawns. And believe me when you make this with prawns or any freshly caught fish, the aromatics in this simple dish elevates the flavor of the fish by hundred times. When you read the recipe you will know why I am calling this a simple dish. Practically there is no ginger, garlic any of those stuffs which we often use to enhance a good spicy curry. But still whenever mom makes this, I feel it is just out of the world yummy. The trick is in how patiently you fry the onions, to give it a nice color and flavor.

After a long long time I had chanced upon some pumpkin in my neighborhood market and I was too eager to add it to my curry. So I thought why not combine the base recipe and pumpkins. I faintly remembered mom also made this combination recipe, so I was confident on the outcome.


This is the first time I was cooking Aar fish by myself. So as they say whenever you try a new fish, make it with spicy gravy so that even if the fish tastes not so good, the curry will save the day. I got the Aar fish from Fresh To Home. FTH has been such a great savior in this lockdown, and i think I am going to stick with it even in the long term because the products they give are really fresh and awesome.

Though this was the first time I was about to work with Aar, it being from the catfish family made me at easy. I am practically a pro with anything to do with the regular magur or catfish curry. It is one of my favorite foods and I love it to the core. When you put magur in any dish you barely need to do any heavy lifting in the curry. The freshness and flavor of Magur itself changes the entire dynamics of the dish.


This recipe goes well with any fish - Magur, Aar, Shoal, Rohu, Catla even prawns and other sea fishes.

Marination Time : 30 minutes
Preparation Time : 10 minutes
Cooking Time: 20 minutes
Serving : 3-4 people

Ingredients :
  • Aar Mach - 500 gm (5-6 pieces)
  • Onion - 2 medium, sliced thinly
  • Green Chilli - 3-4
  • Pumpkin - 100 gm, diced (optional)
  • Coriander powder - 1 1/2 tbsp
  • Red chilli powder (Kashmiri lal mirch)- 1 1/2 tsp
  • Turmeric - 1 tsp
  • Cardamom - 1
  • Cinnamon - 1 inch
  • Jeera (Cumin) - 1 tsp
  • Bay Leaf - 1
  • Salt and sugar to taste
  • Mustard Oil

Procedure: 

1.  First of all wash and clean the fish. Sprinkle salt,turmeric and 1 tsp of mustard oil and coat them well. Let it marinate for about 30 minutes.

Tip: Add oil to the marinade when marinating catfish family of fish. They have a tendency to splutter a lot otherwise while frying. This will reduce the spluttering to a great extent

2. Take mustard oil in a wok. When oil is steaming, fry the fish pieces in batches till they are lightly browned on the sides. Take them out and keep it aside.

3. In the same oil saute the diced pumpkins. Please note this is completely an optional step. But since I love having regular catfish with pumpkins I decided to add some in this gravy as well. Slightly brown the edges of the pumpkin and take them out.


4. Check the oil level in the wok, if it is less add extra mustard oil and let it heat up. Add enough oil to fry two onions. When the oil is hot, temper it with a bruised cardamom, cinnamon, bay leaf and jeera. 

5. Toss in the thinly sliced onions. Add a pinch of salt to the onions to cook it faster. Give it a good toss and let the onion cook

6. Meanwhile in a bowl, take about half a cup of warm water. Add all the dry powdered spices to create a spice mix - turmeric, coriander, red chilli powder. Give it a good stir and let it sit till the onions are done

7. Onions should get cooked and slightly browned along the edges. Add the spice mixture and give it all a good stir. Keep the flame at medium-high. Add the salt and sugar at this stage. 

Tip: I like this particular gravy a little sweet and spicy. So the amount of sugar is more than other fish gravies, like i almost added 2 and 1/2 tsp of sugar to this. But if you don't like a sweeter curry then adjust the taste accordingly. 

Also, pumpkin gravies go well with a little sweetness, so that's another reason for adding sugar.


7. When it starts to release oil, add about two cups of warm water and fold in. Add the fried fish pieces and slitted green chillis.


8. Let it cook for about 5 minutes with lid on. Then add the fried pumpkins and cook for 5 more minutes giving it a slight stir.


The quick and easy fish curry is ready in a jiffy. Serve it with white rice and enjoy!

Do try this out and tag me (@curriesnstories07) on Instagram on your photos whenever you try the recipe and I will give a shout out to you.


 Barnali Biswas (curriesnstories07)


Share
Tweet
Share
No comments


Day 65 of Lockdown

As a kid I hated Karela or anything bitter in my meal. Whenever we went to my grandpa's home during vacation, I remember my grandma used to make a dish with Karela/ucche which was one of her signature dish. It comprised of Karela and Shol fish cut into small pieces. That curry was a hot favorite among all the family members apart from me and my cousin who were kids. I was like seriously? You spoil a good fish by putting it into a bitter gravy? Adults - go figure!

But when I grew up and learnt to appreciate Karela there was no looking back. I also tried incorporating it into various dishes including fish dishes and to tell the least I fell in love with it too ultimately. But I still think I cannot match the love that my mom has for karelas. She can have it almost every day even boiled. This recipe is one of mom's which she picked up from some show. I tweaked it a bit according to my liking and here is the final version of it. Hope you enjoy it as well.


Preparation Time : 10 minutes
Cooking Time: 20 minutes
Serving : 2-3 people

Ingredients :
  • Karela - 8 to 10
  • Hing (Aesofotida) -  2 pinch
  • Dry Red Chilli - 4-5 
  • Whole coriander seeds- 2 tbsp
  • Jeera - 1 tsp
  • Fennel seeds - 1 tsp
  • Coconut shaving - 2 tsp
  • Onion - 2 big, chopped
  • Besan - 1 tbsp
  • Turmeric - 1 tsp
  • Red Chilli Powder - 1 tsp
  • Raisins - 10-12
  • Tamarind pulp/ Amchur powder - 1 tsp
  • Salt and sugar to taste
  • Refined oil
  • Ghee - 1 tsp
Procedure: 

1.  First of all scrape the skin of the karela. Wash the scraped karela and add half a tea spoon of salt and rub well on each. Let it sit for 30 minutes. The salt will help in minimizing the bitterness.


2. After 20 minutes, take the karelas and wash under tap water. Shake off the excess moisture form each and make long slits on one side of the karelas. Using the back of a spoon or a knife you can carefully take out all the seeds.

Tip: if you are just making a dry version of the bharwa karela, then you can preserve the seeds and add it to the filling to give an extra crunch. But I am making gravy version of it with same masala so I discarded the seeds. Seeds in gravy would not make for a good texture so avoid in gravy

3. Now take a pan and enough water to submerge all the karelas. Add turmeric to the water and blanch the karelas till about half cooked.


4. Drain the water and take out the karelas. They should look something like the below picture. They are half cooked but still firm. Let the karelas cool


5. Now take a flat pan and dry roast the masalas - 2 tbsp coriander seeds, 1 tsp cumin, 1 tsp fennel and 5-6 dry red chillis.


6. Once cool, grind the roasted masalas to a fine powder like below.


7. Take a work, take 3 tbsp of refined oil and when its hot, temper it with a pinch of hing

8. When aroma of hing comes add chopped onions. Add some salt and give it a nice stir

9. Add about 2 tbsp of fresh coconut shavings and fold in.


10. Add 1 tsp of turmeric and 1 tsp of chilli powder and fold in. Adjust salt and sugar. Cook the onions till it starts to release oil

Tip: If you are making dry bharwa karela, then you can add the crushed seeds at this stage.


11. Once the onions turn brown and starts releasing oil, add the ground masala prepared above and fold in. Add 1 tsp of ghee to bring out the flavours better.


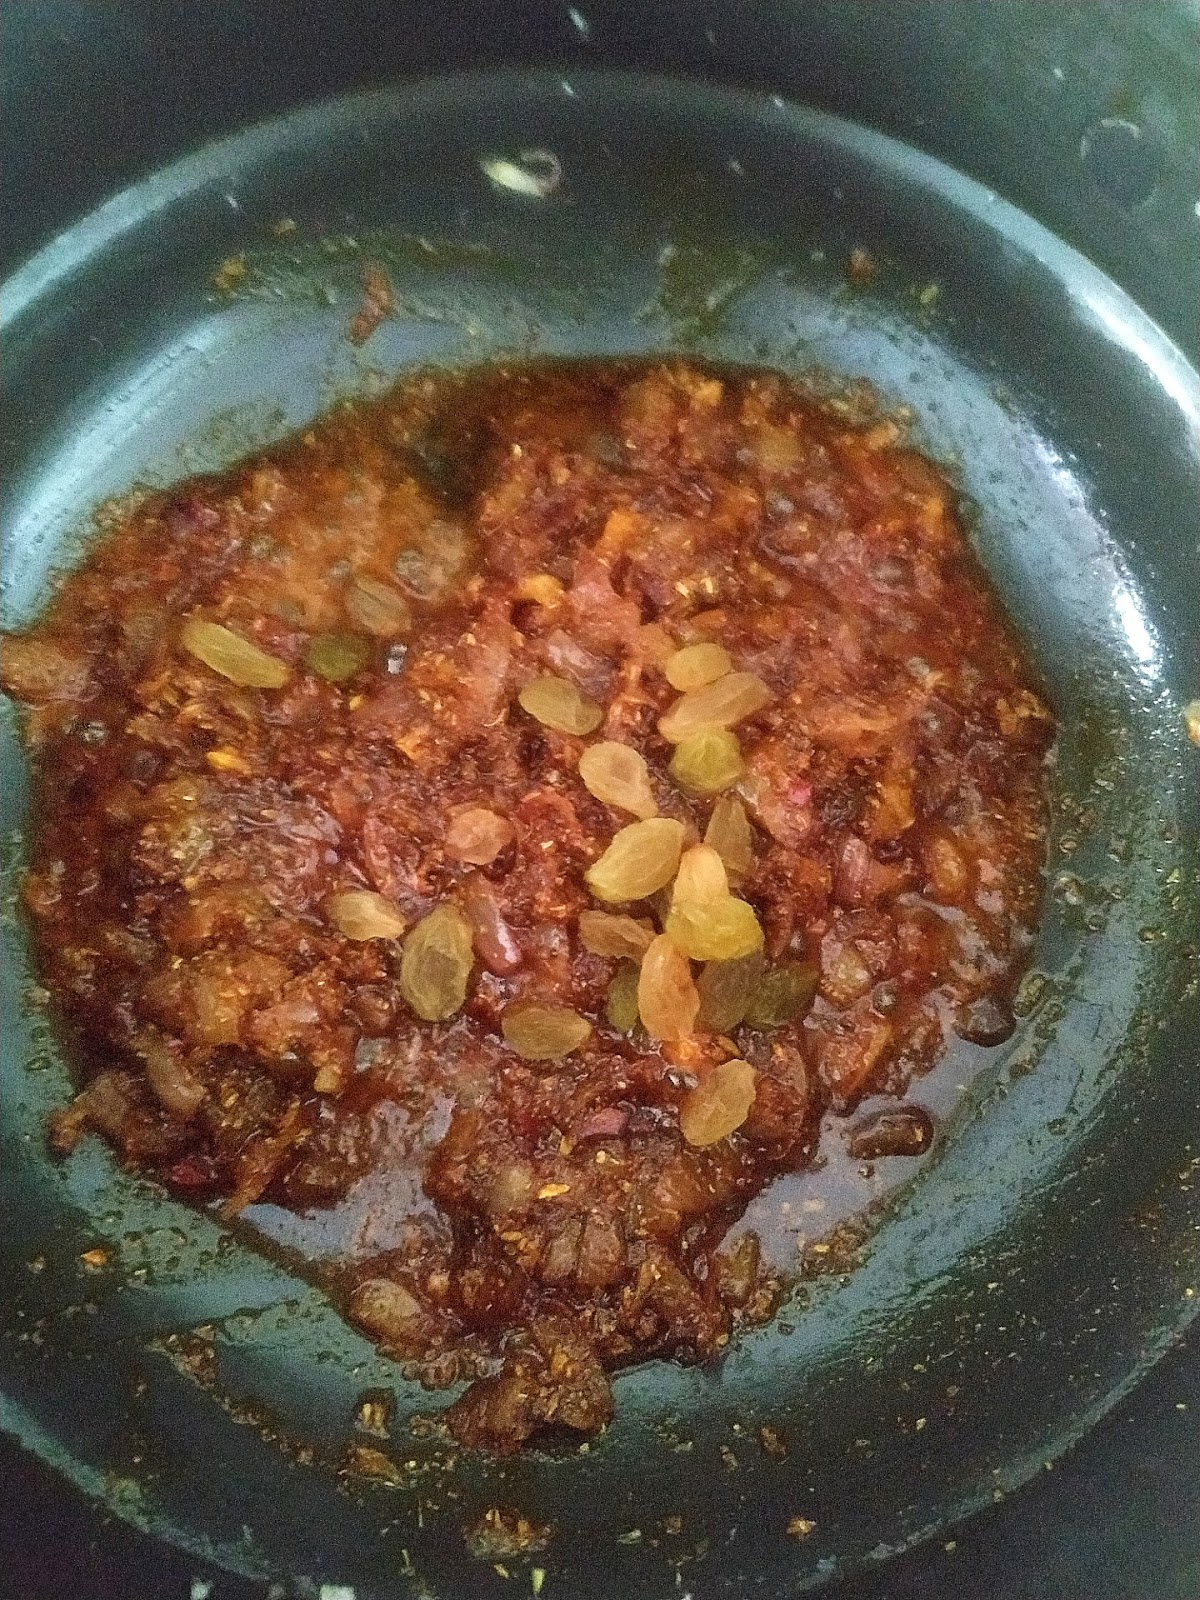
12. Add the raisins at this point and fold in. Add a little water if you feel the masala is sticking to the wok.


13. When the mixture releases oil it will look like below

14. Now add the besan. Fold in. The besan will make the overall consistency thick and dry.


15. Finally the filling will look like below. Let the filling cool down a bit before stuffing. Take 1/4th of the filling and keep it aside, we will use it to make the gravy. 3/4th of the filling will be used for stuffing


16. By now the karelas would have cooled down. Stuff the karela with the stuffing.


16. Tie a thread around each of these stuffed karelas, to prevent the stuffing from coming out while frying.

17. In the wok heat oil. When the oil is hot, add a pinch of hing and saute for a couple of seconds. Then add the stuffed karelas one by one. Fry them by gently turning them around. Keep flame low or medium, to prevent burning.

Tip: Don't cover and fry, it will help in maintaining the green color of the karela


18. Once all the karelas are fried, keep them aside. Now start making the gravy. Add the 1/4th filling back to the wok and heat it up a bit. Then add two cups of hot water and stir in everything uniformly. 

19. Add 1 tsp of tamarind pulp. If you don't have the pulp, you can replace it with amchur powder. Let it simmer till the gravy reaches a thick consistency. Adjust the salt and sugar levels.


20. Now add the fried stuffed karelas into the gravy and simmer on low flame for 3-4 minutes.

Garnish with some roasted sesame seeds and serve. Goes well with any Indian flatbreads or simple dal chawal. To eat just untie the threads and enjoy!

Do try this out and tag me (@curriesnstories07) on Instagram on your photos whenever you try the recipe and I will give a shout out to you.


Share
Tweet
Share
No comments

Day 60 of Lockdown

First of all Eid Mubarak to any of my readers who is celebrating it today. The year has been pretty weird for all of us, and we are spending most of the celebrations locked up in our homes. But this is also an experience. What cant we achieve even when our resources are limited? Its just a mindset change that's it. 

This being a long weekend, I thought why not try something more elaborate this time. I had some chicken languishing in the freezer for quite sometime now. Thought to put that to good use. I am not a big biryani lover or rather I am a biryani lover but I am very specific about what biryani I like. Most of the times biryanis have mint in it, and frankly for me that is a put off. Now being a Bengali you might assume I like the kewra flavored biryani. But o I don't like that as well. Any strong smelling agent really puts my taste buds off. Rice cooked with the natural fragrant of slow cooked meat with a few essential spices is all that I want in any kind of meat-rice. So I am more of a Pulao person than a biryani person I realized long back.

While checking out some nice pulao recipe on the net I had stumbled upon the name of Dhakai Morog Pulao. It was intriguing because Dhaka is the capital city of Bangladesh, and Bangladeshi cuisine, especially puran dhaka is really famous for its variety and taste. Traditionally this is cooked with desi morog (rooster) but if you don't get a rooster you can always replace it with chicken. That is what I have done here.

After browsing though almost 8-10 morog pulao recipes I made an extract of all the steps I felt would suit my palate. So this is how I made this recipe. The key to a good biryani or pulao is the ratio of meat to rice. Once that is handled you are good to go. I have basically  used 2:1 ratio of chicken to rice. Which means rice is half of amount of chicken. The recipe wont taste like a biryani, because its much mildly spiced than a typical biryani. Green chillies add the necessary heat to cut through the fried sweet onions. 

It is pretty elaborate and takes as much time as to make a biryani. But its worth all the effort.


Marination Time : Overnight
Preparation Time : 30 minutes
Cooking Time: 1.5 hours
Serving : 2 person

Ingredients (for Chicken):
  • Chicken - 500 gm
  • Hung Curd - 1 cup
  • Red chilli powder - 2 tsp + 2 tsp
  • Bay leaf - 2
  • Cardamom - 3
  • Black Cardamom - 1
  • Cinnamon - 2 one inch 
  • Clove - 2
  • Onion - 2 cup
  • Green Chilli - 2-3
  • Tamarind Paste - 1 tbsp
  • Ginger - 1 tbsp
  • Garlic - 1 tbsp
  • Green Chilli Paste - 1 tbsp
  • Sugar - 2 tbsp
  • Almond paste - 2 tbsp
  • Poppy seed paste - 2 tbsp
  • Milk - 1 cup
  • Salt to taste
  • Ghee- 1/4th cup
Ingredients (for Rice):
  • Basmati/ Fragrant rice - 250 gm
  • Ghee - 1/4 th cup
  • Water - 375 ml (3/4 th of 500 ml)
  • Milk - 125 ml (1/4th of 500 ml)
  • Bay leaf - 1
  • Green cardamom - 2
  • Cinnamon - 1 inch
  • Sugar - 1 tsp
  • Salt - As per taste
Ingredients (for finishing):
  • Raisin - 9-10
  • Green Chillies - 3
  • Rose water - 1 tbsp
  • Boiled Egg - 1
  • Potato - 1 large, halved and fried
Procedure (Preparing the chicken): 

1.  Wash and clean the chicken. Preferably take big leg piece. Make a few slits in the bigger pieces.

2. Take hung curd in a bowl and add 1 tbsp red chilli powder. Mix into a uniform thick paste

Tip: If you are using any market bought curd, then make sure you drain all the water from. Either keep it in a muslin cloth and let water drain. Or simply put it in a strainer and let it sit for a while. 


3. Coat the chicken with the paste and let it marinate overnight or at least for 2-3 hours. I marinated overnight. 

Tip: Please note I am not adding any salt to the marinate. Because salt would drain water out of the chicken and make the marinate watery.


4. Take a deep bottom wok and heat the ghee in the wok. When fragrant add the whole masalas - green and black cardamom, cinnamon, bay leaf and cloves.

Tip: To get the authentic flavor of Morog Pulao, make sure you do the cooking entirely in ghee. But if you don't want to add all ghee, then substitute half with any refined oil.


5. Chop the onions into slices and when the spices are fragrant, add the onions into the ghee. Need to fry this onions till it attains the beautiful reddish brown color of barista. 

Tip: Keep the flame of the gas on high and you need to continuously stir to make sure the onion doesn't burn

6. When the onion gets the reddish color, add the ginger and garlic paste and fold in. Add about quarter cup of water and stir in, to prevent it from sticking to the wok. 

7. Add the chilli paste. Cover and cook till the onions are soft and oil comes out. Keep checking on the onions regularly to prevent from burning.


8. When the water dries out and onion is soft, add the marinated chicken along with the marinade. Fold in. 


9. Add the tamarind pulp at this stage and fold in

Tip: If you don't have tamarind pulp you can substitute it with tamarind sauce but it might tamper with the flavor. So i would recommend in that case omit the step completely.


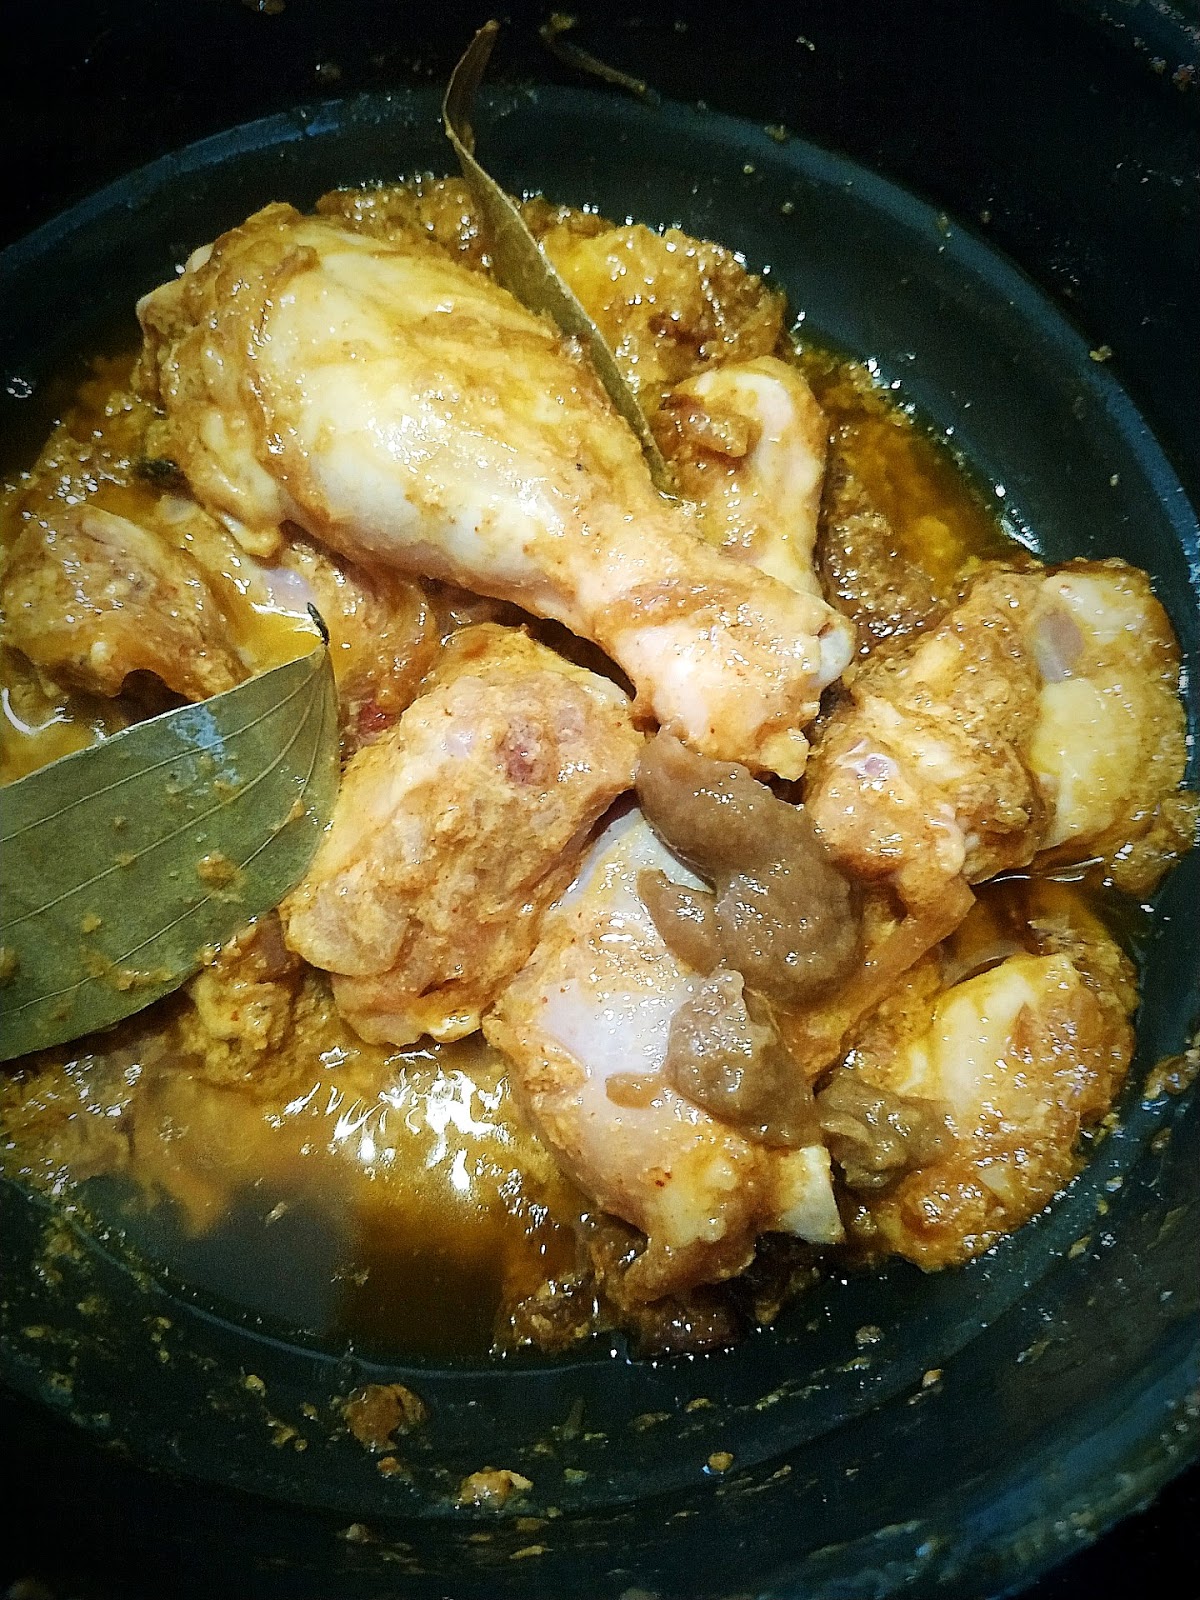
10. Cover and cook the chicken till it starts getting white or changes color. Keep turning the chicken frequently so that it doesn't stick to the wok.

11. Make a paste of poppy seeds and almonds.

Tip: This can be done two ways. Either dry roast the poppy seeds and the almonds and then grind to a paste. Or simply grind the raw poppy seed and almond into a paste. The first option would give a slightly nutty aroma to the chicken. I followed the first. 

Tip: If you don't have poppy seeds or almond, you can omit this step. Or if you have any one of them that is also fine. Almond can also be replaced with cashew.

12. Add the poppy seed and almond paste and fold in. You need to stir continuously to make sure it doesn't stick.


13. Boil the milk and keep ready. At this stage after mixing the nut paste add the milk and stir in. Cook the chicken with cover on till the chicken becomes soft.

Tip: The milk should be boiled and hot when it is added to the wok, otherwise it may curdle.


14. Chicken will start releasing water. Now cook till the water starts to dry off and the gravy thickens. At this stage add the sugar and fold in. Now keep the gas on sim and let it cook till the water evaporates and gravy becomes pretty thick. Make sure you stir the chicken frequently. 

15. Now follow the rice cooking procedure

16. Chicken should be nicely cooked by now. Switch off the flame and take out the chicken in a separate dish. 


17. Now continue with assembling of the rice procedure

Procedure (Preparing the rice): 

1. Take basmati or any flavored rice and wash it properly. Drain the water and keep it to dry. All water should be properly drained before we start cooking the rice. 

Tip: The amount of rice should be half of the weight of chicken. Since I had taken 500 gm chicken so I have taken 250 gm rice

2. When the chicken is almost done, we will start cooking the rice. Take another deep bottomed kadai and add heat it.

3. Add ghee and when it is hot add the bay leaf, cardamom, cinnamon. 

Tip: Again the pulao should be completely made in ghee to get the authentic flavor.

4. Now add the washed rice into the wok and keep stirring softly. Fry the rice till you feel it becomes heavy.


5. Now the water to cook the rice needs to be added. Water should be double the amount of rice. Which means 500 ml of water. Now instead of 500 ml of water, i have taken 3/4th water and 1/4th milk.  Make sure both milk and water are boiling hot when adding, this will quicken the cooking process. Add 1 tsp of salt and sugar to it and fold in everything nicely.


6. At this point the gas is on full and cooking without a lid while stirring regularly. Continue to cook till the water starts reducing and you can see the rice. Now lower the gas on medium and cover and cook till the water is absorbed and rice is 3/4th cooked. You can occasionally give it a gentle stir just to make sure all the rice is cooked. 

Tip: Take care not to stir vigorously because it will break the rice. Be very gentle while stirring.


7. While the rice is cooking go to step 16 of chicken.

Procedure (Assembly of the Pulao)

1. The rice should be 3/4th cooked and all the water should be absorbed by now. Take off the lid and switch off the gas. Now the chicken and the rice assembly will begin which will take some time so it is better to switch of the gas at this point.

2. Take off half of the cooked rice into a separate dish. 

3. Take the gravy from the chicken and spoon it over the rice. You can also mix it a bit. 

4. Now place the chicken pieces on the rice in a single layer. Take care while handling the chicken as it might break. Add the fried potato and boiled whole egg at this point. 


5. Now add the other half of the rice on top of the chicken and egg layer uniformly so as to cover the chicken completely.

6. Add a few raisins, slitted green chilli on top.

7. Sprinkle 1 tsp of rose water over the rice

Tip: For those who love the flavor of Kewra can add 1/4th tsp of kewra essence at this point. Personally I don't like it. 


8. Now cover the lid and if it has any steam outlet then block it with a clove. Put the gas on low and let it sit on dum for about 10 minutes.

Tip: If the wok doesn't have a heavy bottom then, the rice may stick, so just add a tawa below the wok so as to distribute the heat properly to the wok.

9. After 10 minutes, let the rice sit for about 5 minutes more before serving.

Gently mix the pulao before serving. have it just like that or with raita or any other non veg gravy side.

Do try this out and tag me (@curriesnstories07) on Instagram on your photos whenever you try the recipe and I will give a shout out to you.


Share
Tweet
Share
2 comments

Day 57 of Lockdown 

The week has been going much smoother now. I got my first big basket delivered groceries after two months yesterday. Though they are yet not delivering till your doorstep, but still delivering till the society gate is also good enough. 

Amidst the covid situation Bengal and Orissa had to battle out a new peril - the Amphan cyclone yesterday. Massive destruction happened all over. I can see my friends updating about their respective areas on the social Media. My mom who is now in Kolkata also described how bad it was for all those hours when the storm was raging. Most homes and apartments are inundated. Getting through the phone was also not easy as there is service disruptions all over. I cant even imagine what the poor folks are going through. Its just that somehow 2020 feels quite jinxed. We are days away from June and don't even know where half of the year disappeared. I just hope things become less taxing for us and we get time to recover from all that is happening.

The week has been super hectic for me in terms of office work. previously our office times used to be restricted to 9 hours. But now since we are working form home there is no boundary between work hours and personal time. Rather there is no personal time at all. From 9 it has gone up to 14 hours on an average daily. But we are not complaining much, as we all know we are grateful to have a job in these trying times.

Getting time to cook among all this is another challenge. So most of the time I do some pre-preps on the weekends for the week ahead. And in between just make something which is not labor intensive. Have had this nice Rohu eggs lying in my freezer for sometime now, so decided to make a quick batch of Macher dimer bora. 

Macher dimer bora/Fish egg pakoda/fish roe is a very popular food accompaniment in Bengal and are considered as a culinary delicacy. This is mostly prepared during the rainy season as during that time the fish have eggs. The most popular ones are the eggs of Rohu and Hilsa. The eggs are also sold separately for this two fishes.

For all the vegetarians or the rest of India, the concept of fish eggs might be very weird. I know this because once I was talking about macher dimer bora with my office colleagues most of whom belonged to central and western India and one of the guys was wide eyed when he learnt fish produce eggs 😂. As he overcame the shock, the next question he asked was how do you cook the fish eggs, make into an omelette with each egg? And I was at a loss of words. Then I thought, that's right, people who didn't have a clue as to how these things look will try to associate with the only thing we identify as eggs. When I explained to him the entire thing, he was like wow I learned something amazing today :). But this thing is not so rare. In fact we all know about a much more glamoured version of fish roe which is known as caviar. But that is very expensive, while the normal fish eggs are damn cheap. They come along with the fish at times.  I hope you enjoy this simple and quick recipe which peps up your weekday lunch.


Preparation Time : 10 minutes
Cooking Time: 15 minutes
Serving : 20-25 pieces

Ingredients :
  • Fish Egg - 1 cup ( I had Rohu)
  • Onion - 1 medium
  • Green Chilli - 2-3
  • Coriander Leaf - 1/4th cup, chopped finely
  • Ginger - 1/2 inch
  • Turmeric - 1/2 tsp
  • Red Chilli Powder - 1/4 tsp
  • Rice Flour - 1 tsp
  • Salt to taste
  • Mustard Oil 
Procedure: 

1.  Wash the fish eggs carefully under slow running water, so as to not wash away all the eggs along with the water. Drain the water and keep it in a mixing bowl.

Note: The fish vendors usually separate the fish egg pouch and give it to you separately. 

2. Chop the onion and chilli and add it the to bowl. Add grated ginger root and chopped coriander leaves. Add turmeric, salt, rice flour and chilli powder. Mix everything well. It will look like a thick cake batter

Tip1: It is always better to use your hand for mixing this, as doing it with a spoon might leave lumps. However do not squish the eggs, gently break the membrane with fingers and allow the egg to mix with the rest of the ingredients.

Tip 2: Question is how to measure the salt here as u would not like to taste the raw batter. So what I do is, I add salt a little less than i feel is required for the batter amount. Then fry a tiny pakoda and taste it. If salt is less in the fried version then i add the salt as needed.

Tip 3: Rice flour is added to make a crispy pakoda. A few suggest to add gramflour or besan but I feel that tampers the taste of the pakoda.


3. Heat oil in a frying pan. We are going to shallow fry the egg pakodas on medium flame. Now once the oil is hot, take spoonfuls of this mixture and put it on the pan, just in the shape of pakodas. Let one side cook till they are a little browned then flip and repeat the process.

Tip 3: If you are not sure whether the pakodas are cooked to the core, fry one pakoda break it in the middle and it should not be runny inside, but totally cooked. If you find it still soft then increase the frying time. Also you can cover and fry that will lower the cooking time.


4. Drain excess oil on a kitchen towel and serve

Serve it as a side with rice and dal or it also makes up for a good snack item.

Do try this out and tag me (@curriesnstories07) on Instagram on your photos whenever you try the recipe and I will give a shout out to you.


Share
Tweet
Share
2 comments
Newer Posts
Older Posts

About me

I am a software engineer by profession and a writer at heart. Born and brought up in Kharagpur, I moved to the city of dreams Mumbai when I got my first job. Till then I had not cooked a single dish in my life. Not even Maggi or tea. My dad had a strong belief that his little princess never will be in a situation where she had to cook for herself. Hence I was not allowed to spend time in the kitchen till I was studying.


So when I faced the daunting task of living alone, dabbas came to initial rescue. After that I managed a whole year on just boiled vegetables and rice. And then I landed in US. The bounty of fresh produce and cooking ingredients available in the super marts eventually lured me into making my very first meal ever. There was no turning back after that. I finally discovered how much I was in love with cooking and being creative in the kitchen.


This blog is a humble attempt to present our culinary heritage to one and all and document some of the very traditional recipes which gets passed on through generations just by word of mouth.


So just sit back with a cup of tea or coffee and enjoy the curries and the stories related to each.


Follow Us

Footprints

Blog Archive

  • ▼  2026 (4)
    • ▼  May (1)
      • A Suitcase Full of Stories: My Heartfelt Shopping ...
    • ►  January (3)
  • ►  2025 (3)
    • ►  December (1)
    • ►  June (1)
    • ►  February (1)
  • ►  2024 (21)
    • ►  December (2)
    • ►  September (1)
    • ►  August (3)
    • ►  July (4)
    • ►  May (2)
    • ►  April (5)
    • ►  March (3)
    • ►  January (1)
  • ►  2023 (7)
    • ►  December (2)
    • ►  November (1)
    • ►  October (1)
    • ►  May (1)
    • ►  March (1)
    • ►  January (1)
  • ►  2022 (18)
    • ►  September (1)
    • ►  August (2)
    • ►  July (2)
    • ►  June (3)
    • ►  April (1)
    • ►  March (3)
    • ►  February (2)
    • ►  January (4)
  • ►  2021 (60)
    • ►  December (5)
    • ►  October (5)
    • ►  September (5)
    • ►  August (7)
    • ►  July (6)
    • ►  June (5)
    • ►  May (3)
    • ►  April (4)
    • ►  March (6)
    • ►  February (6)
    • ►  January (8)
  • ►  2020 (55)
    • ►  December (5)
    • ►  November (3)
    • ►  October (10)
    • ►  September (7)
    • ►  August (7)
    • ►  July (9)
    • ►  June (3)
    • ►  May (9)
    • ►  March (1)
    • ►  January (1)
  • ►  2019 (3)
    • ►  November (1)
    • ►  April (1)
    • ►  January (1)
  • ►  2018 (1)
    • ►  December (1)
  • ►  2017 (4)
    • ►  December (2)
    • ►  November (1)
    • ►  September (1)
  • ►  2016 (10)
    • ►  August (1)
    • ►  July (2)
    • ►  June (5)
    • ►  April (1)
    • ►  March (1)
  • ►  2015 (10)
    • ►  December (1)
    • ►  August (1)
    • ►  June (1)
    • ►  May (2)
    • ►  April (4)
    • ►  March (1)
  • ►  2014 (22)
    • ►  November (2)
    • ►  August (2)
    • ►  July (3)
    • ►  June (2)
    • ►  May (4)
    • ►  April (3)
    • ►  January (6)
  • ►  2013 (22)
    • ►  November (2)
    • ►  October (4)
    • ►  September (5)
    • ►  August (2)
    • ►  July (1)
    • ►  June (1)
    • ►  May (2)
    • ►  April (1)
    • ►  March (1)
    • ►  February (2)
    • ►  January (1)
  • ►  2012 (31)
    • ►  December (4)
    • ►  October (3)
    • ►  September (8)
    • ►  July (1)
    • ►  June (1)
    • ►  May (14)
  • ►  2010 (9)
    • ►  July (3)
    • ►  June (2)
    • ►  April (1)
    • ►  March (2)
    • ►  February (1)
  • ►  2009 (4)
    • ►  February (2)
    • ►  January (2)

recent posts

Pinterest Board

Popular Posts

  • Champaran Mutton / Ahuna Mutton - A Bihari Delicacy
      When I finish a long week of work, self doubt, frustration of dealing with people and finally when the weekend comes, I feel cooking somet...
  • Kochur Dum / Kochur Dalna / Arbi Masala/ Taro or Colocasia Curry
    August 19 Kochu or taro is one of my favorite vegetables. It is as versatile as potato only much more tasty. It is equally starchy an...
  • Tetor Macher Jhol (Bitter Gourd Fish Curry)
    Anything Bitter hardly finds takers. Same applies for Bitter Gourd. As a kid I hated bitter gourd in any form. Grown ups around me would...
  • Khandeshi Kala Masala - Kala Mutton Masala
      25 September Maharashtra is a land of unique local flavours. And still it is mainly known for its Vada Pavs, poha, pav bhaji and modaks. I...
  • Macher Bhorta | Fish Bharta | Mach Makha| Bengali Style Mashed Fish
      October 18 Bhortas or bharta as we call it in pan India, are the quintessential Bengali food, a staple in Bangladeshi cuisine. They are th...
  • Complete Details to plan your ISKON Mayapur Visit
    Radha Madhav during Pushya Abhishek on 6th Jan 2023 First of all wish you a very happy new year. I have been away from blogging for a while ...
  • Varhadi Mutton - A Traditional Vidharba Cuisine
    Varhadi is a dialect of Marathi typically spoken in Vidarbha region of Maharashtra. Vidarbha is the north-eastern region of Maharashtra ...
  • Dim Toast | Egg Toast | Dim Pauruti | Savoury French Toast
      April 25 Calcutta or Kolkata. A city known for its food and culture, where hospitality and love are synonymous with lip-smacking grub. Cho...
  • Golda Chingri Malaikari (Giant River prawns in coconut milk gravy)
    One of the main reasons I love Kolkata is because of the fish we get here. Its so fresh and one can get restaurant grade fish quality even i...
  • Tangy Sweet Mint Fish | Fish Pudina Recipe | Fish Hariyali
    February 20 I am a hardcore fishiterian..if that's a word. There has been hardly any occurrence where I have tasted a fish and not liked...

Liebster Award

Liebster Award

Very Good Recipes

Very Good Recipes

You can find my recipes on Very Good Recipes

Contact Us

Name

Email *

Message *

Pages

  • Travelogue Index
  • VEGETARIAN RECIPE
  • CHICKEN RECIPES
  • SEAFOOD RECIPES
  • MUTTON RECIPES
  • RICE RECIPES
  • EGG RECIPES
  • DAAL RECIPES
  • ROTI & PARATHA RECIPES
  • BAKING RECIPES
  • SWEET RECIPES
  • SNACKS RECIPES
  • SIDES RECIPES
  • SOUP RECIPES
  • SALAD & BOWLS RECIPES
  • ROASTED RECIPIES
  • JAM & PRESERVE RECIPES
  • BEVERAGE RECIPES
  • SAUCES, SPICES & CURRY BASE RECIPES
  • CHUTNEY & DIPS RECIPES
  • FESTIVE RECIPES
  • Contact Us
  • TRAVELOGUES OF EAST INDIA
  • TRAVELOGUES OF WEST INDIA
  • TRAVELOGUES OF SOUTH INDIA
  • TRAVELOGUES OF NORTH INDIA
  • TRAVELOGUES of ASIA
  • North East Recipe

This Blog is protected by DMCA.com

DMCA.com for Blogger blogs
FOLLOW ME @INSTAGRAM

Curries n Stories © 2020 All rights reserved.
Created with by BeautyTemplates