
DIY Photography Backdrop (Step By Step) | Create Professional Backdrops at Home | Food Photography Backdrop | Tips on what to look for when buying photography backdrops
 |
| DIY Hand Painted Backdrop |
7 December
I had this blog from like a decade and had never actually thought of having some kind of a formal or semi formal setup for taking my food pictures before the lockdown started. During lockdown I stumbled upon many fantastic home chefs who created magic in their food pictures too by the virtue of amazing props and backdrops. That was the start of the inspiration and I had finally decided after much deliberation to invest in a good backdrop.
The first backdrop I got was in the month of April and now I own about 10+ professional backdrops. After using them for over 8 months I could understand which backdrops work for me and what kind of texture I love to work with. I thought of trying my hand at making some DIY backdrops myself because - I could end up saving some bucks, have the customizations I want in color and textures and also because the whole process of creating a backdrop from scratch is super fun!
So I thought before diving into the DIY process here are a few tips for the beginners who are just starting on their formal food photography journey. Now when you start looking for food photography backdrops you always face a couple of basic questions like-
- Where to start looking for a backdrop?
- Which are the reliable and cost effective backdrop providers?
- What kind of backdrops should I buy material wise?
- Which color/texture should I go for.
- Which size would be the best
1. Where
While there are zillion more questions I had, these were some of the generic ones I feel. The answer to the first question is obviously Google. Pre-lockdown (in India) when I started my search there and there were these two names I got against which there were glowing reviews and a host of celebrity patrons - The Madras Prop Store and the Varai Prop Store. This was way back in the month of April. After a little R&D I chose Madras over Varai as the former had an online order option back then. But let me put a disclaimer, both of them are pretty pricy. No doubt about the quality they offer but when you are just starting out on your journey of investing on good backdrops you don't want to burn right through your pockets before you are convinced that your photography skills can justify the investment.
During the lockdown a plethora of businesses came up which offers quality backdrops at more affordable prices. A few of my personal favorites are India Prop Store and Bla Bla Props. I have used their professional backdrops in many of my food photos which you can checkout on my Instagram page.
2. Material
A good food photography background can be made out of anything even some craft paper that you have lying in some corner of your home, cushion covers, any fabric or even your home floors and furniture. However, if you are planning on using the backdrop over and over again then I would recommend to stick to surfaces that are durable, stain-proof and waterproof at least.
Avoid reflective surfaces for food photography, as it may lead to bright spots or ugly reflections on your photograph.
Now when I looked up the backdrops it had various categorizations as in - Painted, printed and wooden backdrops. That is basically the broad segmentation of backdrop categories.
- Hand Painted : Each of these backdrops are painted by hand to give the textures. Something like what we are going to do in this blog later. They have the best textures and colors and feel really premium. Quite pricy.
- Printed : These are high quality printed backdrops. They come in canvas, vinyl and poly fabric. These are the ones which beginners can use, usually are much cheaper than the hand painted and wooden ones. Canvas printed ones have best quality while poly fabrics are not that great but does the job.
- Wooden Backdrops : Wooden food photography backdrops are a great choice as they provide pleasing colors, grain, texture and could be either rustic or chic. You can barely go wrong with a wooden backdrop. But they are the most pricy ones.
3. Size
For food photography, one doesn't really need huge backdrops like portrait photography. Anywhere around 2ft x 3ft is a good size for a good food photography premise. Both flatlay (using with camera angles from above the food) or when the camera is level with the food can be handled well.
4. Color
The background should always compliment your food and not overpower it. Background colors that are neutral, desaturated and not very flashy goes very well with any kind of food. So the first few colors you could try and add to your kitty are black/grey, white and maybe a warm shade of blue. Shades like yellow, red, pink are a little more difficult to contrast with the food and props than the neutral colors. At times instead of plain black color, you can go for shaded black color or one that has a vignette look (decreased brightness around its edges).
Now coming to the process of making a DIY hand painted backdrop at home. This is a project which is very close to my heart and I would like to share with all you folks.
Materials Required:
Base
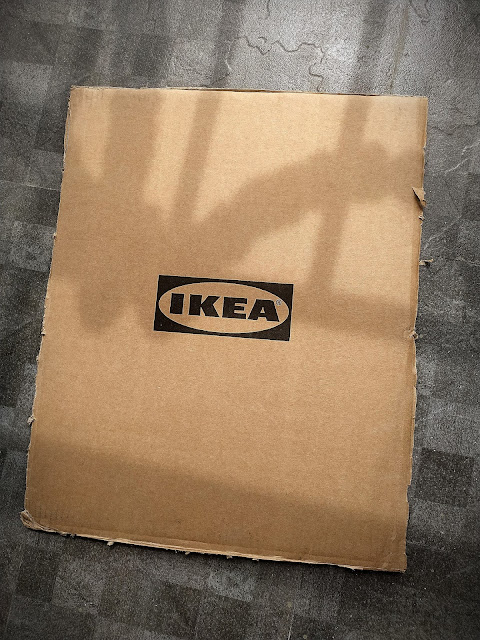
- A cardboard/ MDF board - 2 ft x 3 ft
- Scissor / sharp cutter - 1 (only needed if using cardboard)
- Wide Masking tape - 1
Base Texture
- White cement /Plaster of Paris - 1 cup
- Fevicol - 1 tbsp to 2 tbsp
- Mixing bowl - 1
- Mixing spoon - 1 (I used an old butter knife)
- Jointing Spatula - 1 ( I used a square cut out of same cardboard)
- Water
- Paint Brush - 1
- Newspapers - a whole bunch of newspapers to prevent staining your workplace
- Tissue paper / old cloth - 1 ( for wiping off any unwanted splotches)
- White primer/ Enamel paint - 200 ml tin
- Paint brush - 1
- Gloves - a pair
- Newspapers - a whole bunch of newspapers to prevent staining your workplace
- Tissue paper / old cloth - 1 ( for wiping off any unwanted splotches)
- Acrylic color - Black and white
- A palate/ mixing bowl 2 (for colours) - 1
- Kitchen sponge - 1
- Newspapers - a whole bunch of newspapers to prevent staining your workplace
- Tissue paper / old cloth - 1 ( for wiping off any unwanted splotches)
- Transparent Artists fixative spray/ transparent varnish (Optional) - 1 bottle


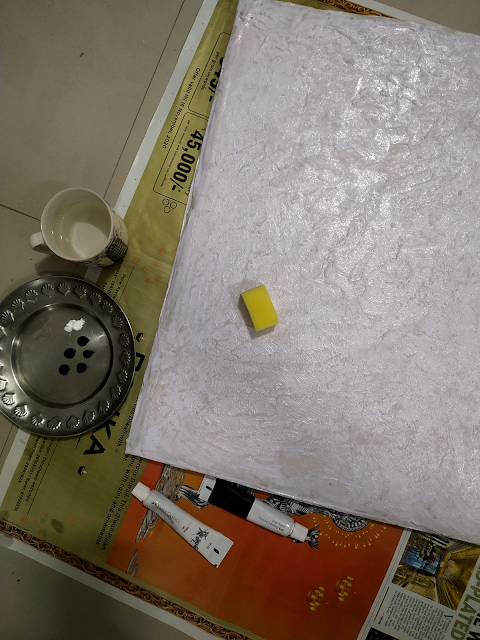

9. Once the complete cardboard is covered with color 1, keep it to dry overnight.

This is an optional but recommended step. Store the backdrops in a place away from direct sun light.

- Cardboard - Rs 0 / MDF - depends on size
- White cement / POP - Rs 20/ kg (Available at hardware store)
- Fevicol - 45 gm - Rs. 20
- Enamel paint - 200 ml - Rs 75 (Available at hardware store)
- Enamel paint brush - Rs 10 (Available at hardware store)
- Flat Brush - Set of 4 - Rs 140 (Available at stationary store/ online stores like Amazon)
- White & Black paint - Rs 200 - Rs 300 ( a full set of 12 colors would come at this price)
- Kitchen Sponge - Rs 0 - Rs 12
- Masking tape - Rs 20
- Cardboard spatula - Rs 0


.png)


3 comments
Hi! Thank You So Much for All of the Helpful Information You Write! I Love This Post!
ReplyDeleteHi! Thank You So Much for All of the Helpful Information You Write! I Love This Post!
ReplyDeleteThanks — I really appreciate how clearly you explained how to create a beautiful DIY photography backdrop at home; it’s practical, creative and really inspiring!
ReplyDeleteLazy Day Marketing LLP