• Home
  • Recipes
    • Vegetarian
    • Seafood
    • Snacks
    • Chicken
    • Mutton
    • Egg
    • Roti & Parathas
    • Dessert
    • Sides
    • Soups
    • Salad & Bowls
    • Rice
    • Daal
    • Bakes
    • Roasted
    • Beverages
    • Sauces, Spices & Curry Base
    • Chutney & Dips
    • Festive Recipes
  • Cuisine
    • Bengali
    • Maharashtrian
    • Rajasthan
    • Punjab
    • Chennai
    • Andhra
    • Mangalore
    • Mughlai
    • Kashmiri
    • Chinese
    • Singapore
    • Mexican
    • Continental
    • Italian
    • French
    • American
    • Thai
    • Bangladeshi
    • Arab & Persia
    • North East
  • Meal Type
    • Breakfast
    • Lunch
    • Dinner
    • Snacks
    • Dessert
    • Appetizer
    • Accompaniments
  • How To
    • Preservation Techniques
  • Travel
    • East India
    • West India
    • North India
    • South India
    • Asia
    • America
  • Lifestyle
    • Craft & Creation
    • Experiences
  • Musing
  • Contact
  • Bengali Blogs

Curries & Stories

pinterest facebook twitter instagram tumblr linkedin

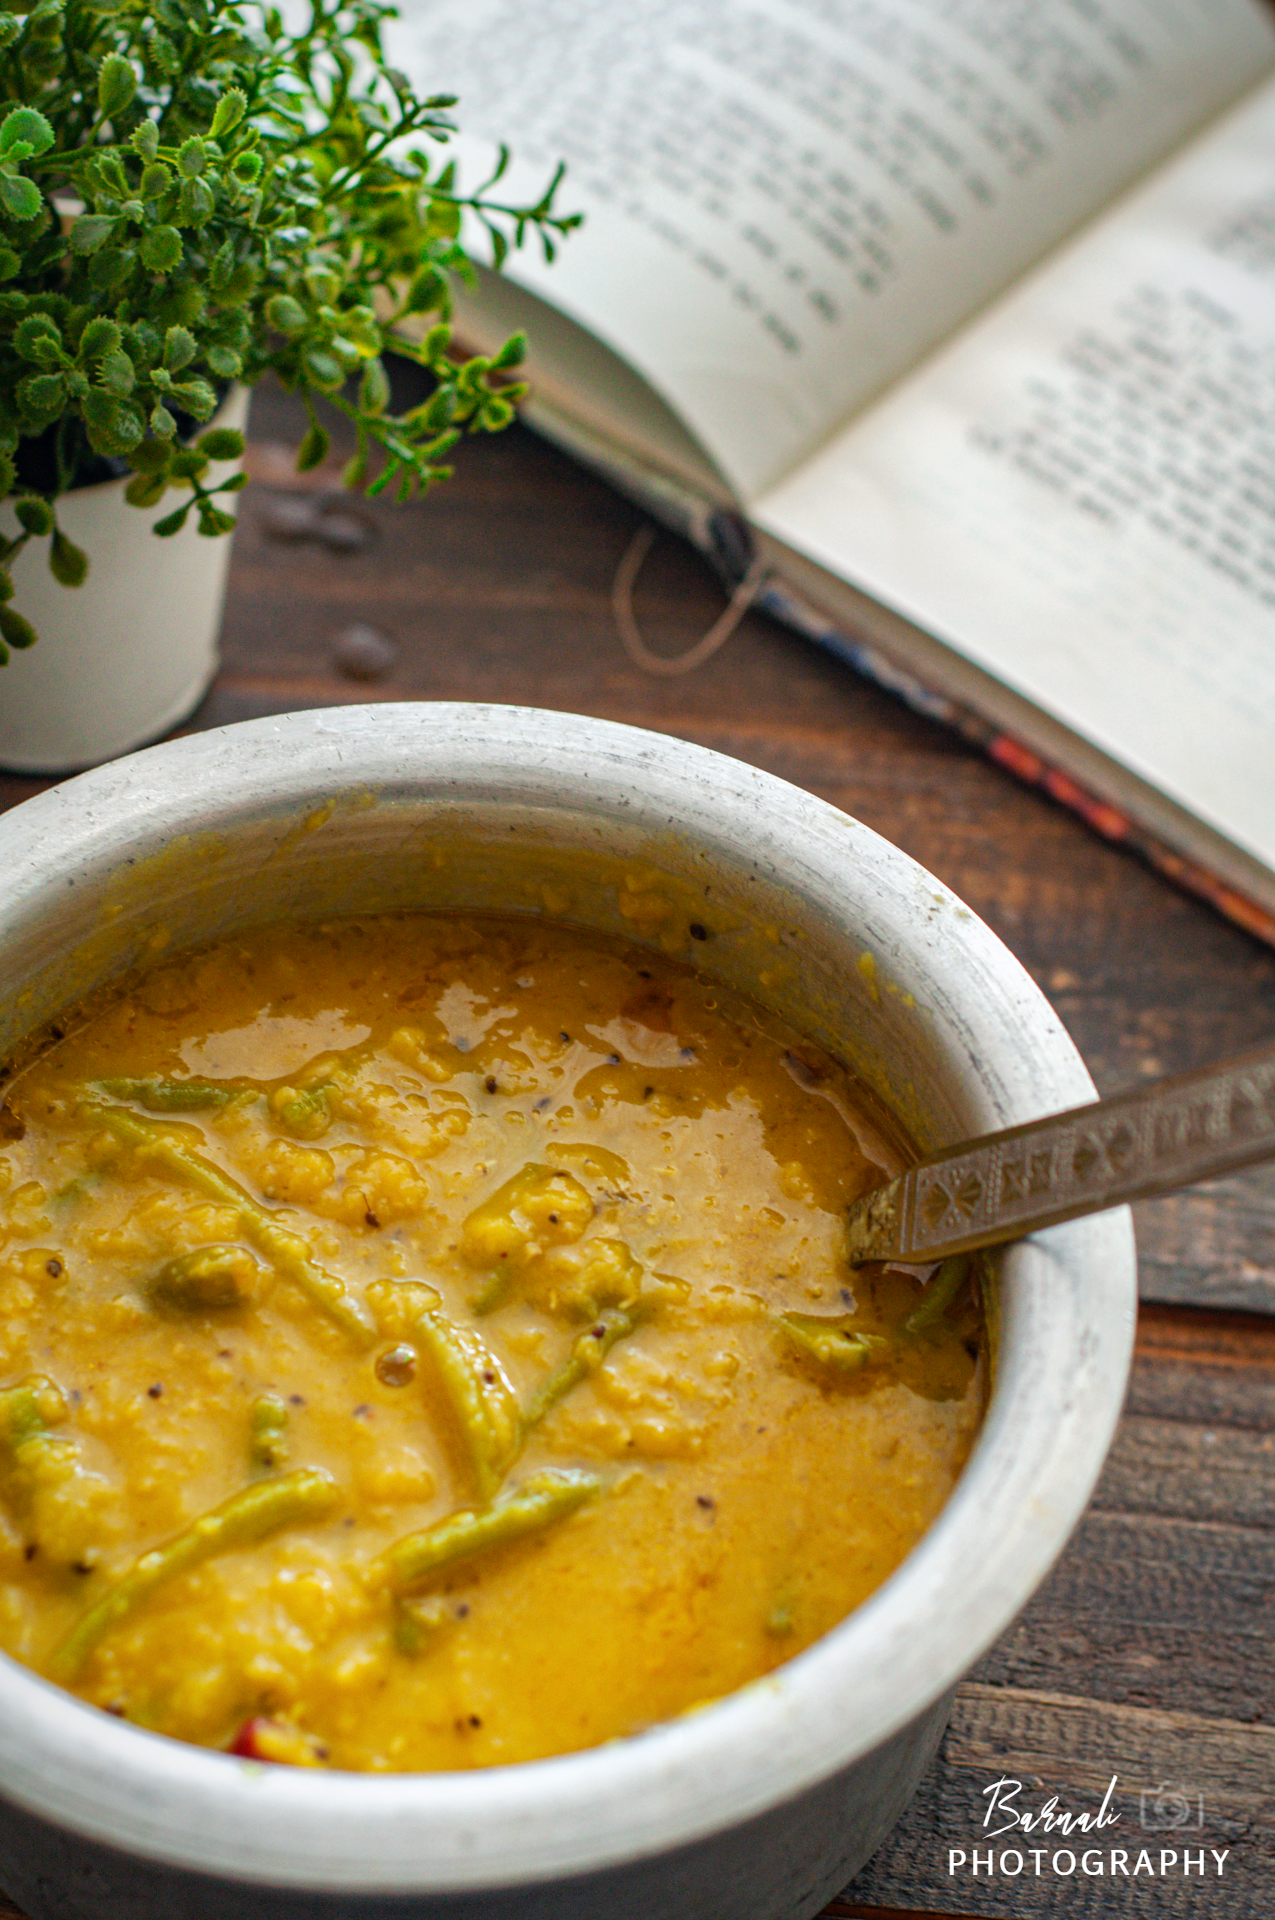
Datar Dal Recipe

This recipe is part of 'Best of Waste' series. As earlier you might have seen other recipes on my blog which were made using vegetable parts which are often discarded in our house holds. I will give a link of them towards the end of the blog.  Converting the vegetable waste into a unique dish is very satisfying for the soul.  It makes you feel like a culinary inventor if the dish ends up being awesome. 

In this recipe I have used the stems of the red saag which is known as Lal Shaak in Bengal and Red Amaranth in Maharashtra. The leaves are usually used to make a dry subzi and the stems are discarded here in Pune.  In Bengal however the thick stems of this Red saag is used for making dals and data chorchori. Thick stems have more flesh in them which makes it enjoyable to chew them. In today's recipe I have used the tender stems of the saag which my maid discarded after cleaning the saag. My maid at times questions my sanity when she sees me cooking with all these waste items. But when the final dish tastes and looks stellar she has to eventually agree that all these wastes pack a punch and can be actually made into nutritious and delicious recipes. 

Since tender stems are used, I made sure to take off any hard skin from the stems. Its very easy to remove them. Just cut the stems halfway through, you will see threadlike skins coming out, then pull the cut stems down which will also pull out teh threadlike skin with it. Keep repeating until you have all the hard skin peeled off. This is also needed as Lal saag stems tend to be a little hard and they don't soak up the seasoning from the dal. Removing the skin helps them absorb all the seasoning. 

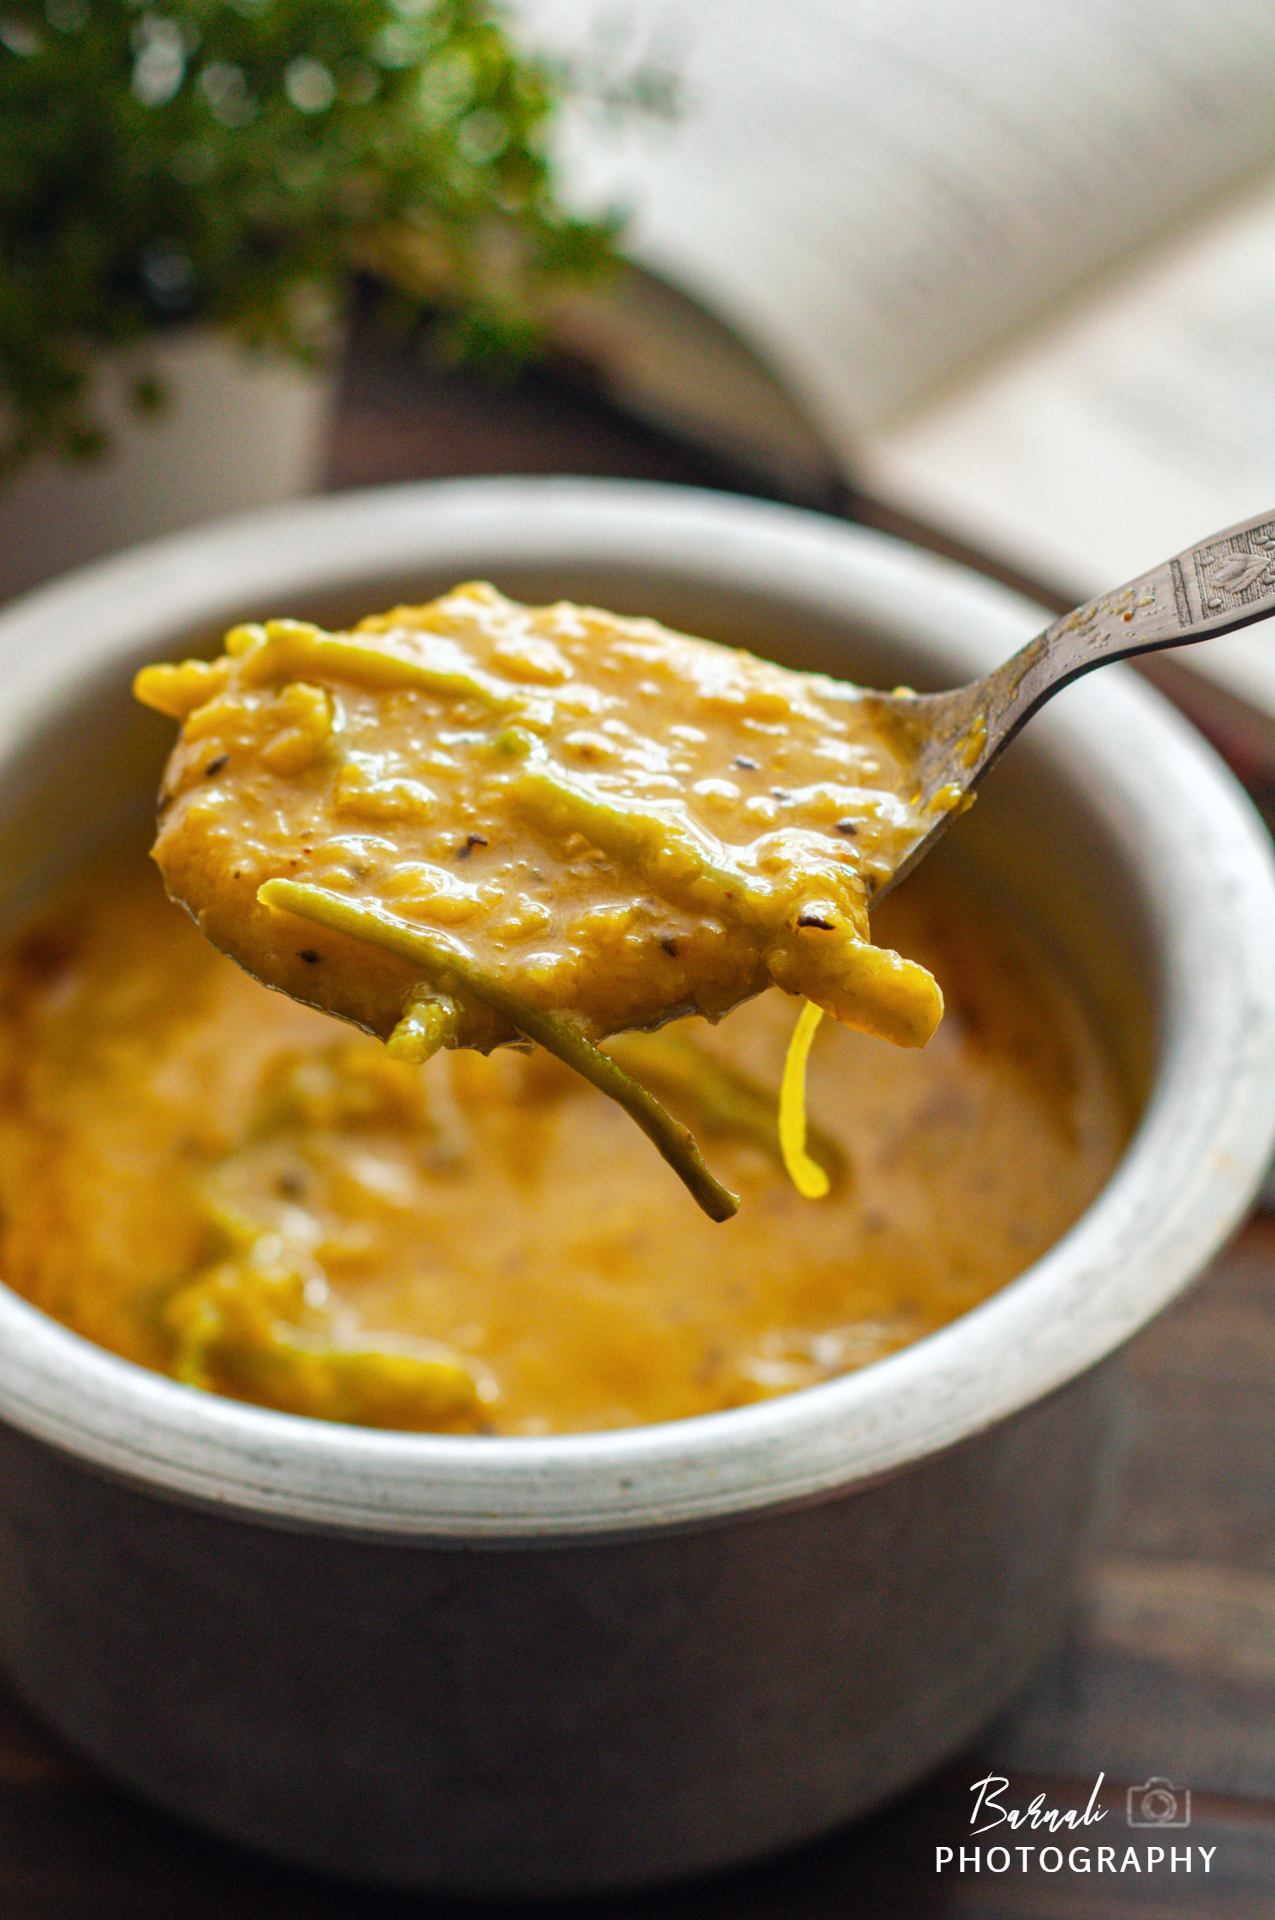
Now you might be wondering, the title says Red Saag Stems so why are the stems in the picture looking green? There is a scientific justification to this. Red vegetables lose their color when cooked because the pigments that cause the color, called anthocyanins, dissolve in water and leach into the cooking water causing color fading. Same is the case here, the color leached into the water in which it was boiled and the stems became green! Another surprising thing was, I did add the red color water into the dal when I boiled it but that did not make the dal red. Which means unlike Beetroot whose color is more pigmented and makes everything red, the Amamranth doesn't impart such a pigmented after effect. You can also make the same recipe with green Amaranth stems as well. The recipe is very earthy and pairs well with steamed rice and any vegetable on the side - perfect for hot summer afternoons.

Datar Dal Recipe

Preparation Time : 15 minutes 

Cooking Time : 20 minutes 

Serves - 4 adults

Ingredients :

  • Masoor Dal - 250 gm
  • Amaranth Leaves Stem - 50 to 100 gm 
  • Radhuni / Celery Seeds - 1 tsp
  • Green Chili - 2 (Slitted)
  • Red Dry Chili - 2 ( broken)
  • Bay Leaf - 2
  • Turmeric - 1/2 tsp
  • Mustard Oil - 2 tbsp
  • Water - As needed ( 2 cups or more as per consistency)
  • Salt - To Taste
Dal Recipe


Procedure :

1. Wash and rinse the masoor dal until all impurities are gone. Let it soak for about 30-40 minutes in some water. This will help in easily cooking the dal.

2. Meanwhile prep the stems. Cut the stems halfway through, you will see threadlike skins coming out, then pull the cut stems down which will also pull out the threadlike skin with it. Keep repeating until you have all the hard skin peeled off. This is also needed as Lal saag stems tend to be a little hard and they don't soak up the seasoning from the dal. Removing the skin helps them absorb all the seasoning. Cut all the stems into 2 inch pieces. Now wash the stems and keep it aside.


3. Now take a pressure cooker and put the washed stems inside. Add about 2-3 cups of water and 1/4th tsp of salt. Close the lid and cook it for a couple of whistles. Then immediately open the lid by placing the closed pressure cooker under running water and helping in the pressure inside to subside. Take out the boiled stems and keep the water ( red color) aside.

Tip: The key to making dals with vegetables is to have the vegetable stock cook with the dal. But if you boil the dal and the soft veggies together, the vegetables might disintegrate. So the tip is to cook them separately one by one. First the veggies, then use the veggie stock to cook the dal so that all the nutrients and taste remains in the dal as well.


4. Now take the soaked dal and add the red water from the steams boiled in Step 3. Top up with more water if needed, we only need to keep the water level as much in the pressure cooker to just submerge the dal. This ensures when the whistles start coming excess water is not flowing out.  Cook for a couple of whistles, and then let the pressure cooker stand till the pressure inside dies down naturally. 

5. Now open the pressure cooker lid and while the dal is still hot, using a ladle give everything a nice whisk for a couple of minutes so as to break down the dal into a uniform thick texture. Note that this makes the dal more tasty.

6. Now take a kadai and heat mustard oil. Once the pungent smell of mustard oil is gone and the oil is smoking temper it with bay leaves, radhuni and dry red chilies. Sauté it for a few seconds till you get the aroma of the spices. Now add the boiled stems from step 3. Sauté it for a few more minutes. Now add the whisked dal and fold in. Add salt, turmeric and slitted green chilies. mix everything well and cover the kadai. 

Tip : In case you dont have radhuni handy, you can replace it with Kalo Jire or kalonji or even the regular cumin.


7. Let it cook for about 3-4 minutes or until the dal comes to a rolling boil. Now drizzle some mustard oil on top and switch off the flame. Let is sit covered for the aroma of the mustard oil to incorporate with the dal.

Serve it with steamed rice and a choice of vegetables in the side. 

Other 'Best of Waste Recipes':
  • Lau er Khosha Bhaja
  • Beetroot Greens
  • Kach Kolar Khosha Bata


Share
Tweet
Share
No comments


Usually sona moong daal has an elite status in Bengal . It's a smaller variant of the regular moong daal and is more flavorful than its counterpart. It is not that commonly found in rest of India however. But one can elevate the beautiful aroma of moong daal just by following a simple trick - dry roast it. It serves two purposes- the daal becomes more aromatic and also it doesn't stick to each other.  Popularly we call it as Bhaja Moong er daal or fried moong daal. Its sort of a misnomer, because we really do not fry it but dry roast it. The earthy aroma of dry roasted daal on slow flame gives the daal its characteristic flavor. 

We cook moong in both ways - with or without roasting. The without roasting variant has easier recipes while the roasted one follows an elaborate recipe to create a scrumptious daal loaded with beautiful spices, roasted coconut chunks, vegetables or fish. While it tastes awesome that way, the process is long and laborious. So when you are looking for a quick weekday daal, it really doesn't fit the bill. And that is the reason why I used to not make moong daal very often until a few weeks ago.

My mom told me about a very simple moong daal recipe comprising of only Kalonji (Kalo jire) and chillies in the tempering. Initially a person like me who is either used to adding whole garam masala or white jeera would find it hard to visualize how the Kalonji will go with the flavor profile. But when I did give it a shot, it turned out so amazing that it has now become one of my go to daals. Its quick, easy and delicious. The fragrance of kalonji fried in ghee weds the earthy aroma of roasted moong and creates a lingering magic.

Preparation Time : 5 minutes
Cooking Time: 20 minutes
Serving : 3-4 people

Ingredients :
  • Moong Daal - 250 gm
  • Kalonji (Kalo Jire) - 1/2 th tsp
  • Bay Leaf - 1
  • Green Chilli - 3, slitted
  • Ghee - 2 tsp +1 tsp
  • Turmeric - 1/2 tsp
  • Salt to taste

Method:

1. Dry roast the Moong daal in a flat pan, preferably with wide surface area, so that you can move around the daal uniformly. Do this on a low to medium heat.

Tip: Keep stirring the daal to roast it uniformly. If you let it just sit there, some might burn while others might not even be roasted.

Note: Daal has to be washed after it is roasted.

2. As soon as you can see them turning a light shade of golden brown and get a nice aroma, transfer them to another vessel and wash it nicely with water.

3. Transfer the washed daal into the pressure cooker and add necessary amount of water (add more water if you want a soupy daal). You can keep this to soak for about 30 minutes and then pressure cook, so that it gets cooked sooner or you can directly put it on pressure cooking for approximately 2 whistles. Let the steam die off and then open the lid and give it a nice stir. If the daal breaks a bit it will taste better and the consistency will be thicker.

3. Now in a wok add 2 tsp of ghee. Once heated add the kalonji, bay leaf and the slitted green chillies.

Tip: Remember to slit the chillies before adding to the ghee, else it may splutter.

4. Add the boiled daal and fold in.

5. Add turmeric and salt and give it a stir. Let it simmer for about 5-7 minutes on medium flame with lid on. Once it comes to  a rolling boil, switch off the flame and top it off with 1 tsp of ghee. Put the lid back on and let it sit till you are ready to serve.

Tip: Vary the ghee amount as per your liking. 

Serve it with steamed rice and choice of vegetable subzi or fritters.

Do try this out and tag me (@curriesnstories07) on Instagram on your photos whenever you try the recipe and I will give a shout out to you.


Share
Tweet
Share
No comments
Older Posts

About me

I am a software engineer by profession and a writer at heart. Born and brought up in Kharagpur, I moved to the city of dreams Mumbai when I got my first job. Till then I had not cooked a single dish in my life. Not even Maggi or tea. My dad had a strong belief that his little princess never will be in a situation where she had to cook for herself. Hence I was not allowed to spend time in the kitchen till I was studying.


So when I faced the daunting task of living alone, dabbas came to initial rescue. After that I managed a whole year on just boiled vegetables and rice. And then I landed in US. The bounty of fresh produce and cooking ingredients available in the super marts eventually lured me into making my very first meal ever. There was no turning back after that. I finally discovered how much I was in love with cooking and being creative in the kitchen.


This blog is a humble attempt to present our culinary heritage to one and all and document some of the very traditional recipes which gets passed on through generations just by word of mouth.


So just sit back with a cup of tea or coffee and enjoy the curries and the stories related to each.


Follow Us

Footprints

Blog Archive

  • ▼  2026 (4)
    • ▼  May (1)
      • A Suitcase Full of Stories: My Heartfelt Shopping ...
    • ►  January (3)
  • ►  2025 (3)
    • ►  December (1)
    • ►  June (1)
    • ►  February (1)
  • ►  2024 (21)
    • ►  December (2)
    • ►  September (1)
    • ►  August (3)
    • ►  July (4)
    • ►  May (2)
    • ►  April (5)
    • ►  March (3)
    • ►  January (1)
  • ►  2023 (7)
    • ►  December (2)
    • ►  November (1)
    • ►  October (1)
    • ►  May (1)
    • ►  March (1)
    • ►  January (1)
  • ►  2022 (18)
    • ►  September (1)
    • ►  August (2)
    • ►  July (2)
    • ►  June (3)
    • ►  April (1)
    • ►  March (3)
    • ►  February (2)
    • ►  January (4)
  • ►  2021 (60)
    • ►  December (5)
    • ►  October (5)
    • ►  September (5)
    • ►  August (7)
    • ►  July (6)
    • ►  June (5)
    • ►  May (3)
    • ►  April (4)
    • ►  March (6)
    • ►  February (6)
    • ►  January (8)
  • ►  2020 (55)
    • ►  December (5)
    • ►  November (3)
    • ►  October (10)
    • ►  September (7)
    • ►  August (7)
    • ►  July (9)
    • ►  June (3)
    • ►  May (9)
    • ►  March (1)
    • ►  January (1)
  • ►  2019 (3)
    • ►  November (1)
    • ►  April (1)
    • ►  January (1)
  • ►  2018 (1)
    • ►  December (1)
  • ►  2017 (4)
    • ►  December (2)
    • ►  November (1)
    • ►  September (1)
  • ►  2016 (10)
    • ►  August (1)
    • ►  July (2)
    • ►  June (5)
    • ►  April (1)
    • ►  March (1)
  • ►  2015 (10)
    • ►  December (1)
    • ►  August (1)
    • ►  June (1)
    • ►  May (2)
    • ►  April (4)
    • ►  March (1)
  • ►  2014 (22)
    • ►  November (2)
    • ►  August (2)
    • ►  July (3)
    • ►  June (2)
    • ►  May (4)
    • ►  April (3)
    • ►  January (6)
  • ►  2013 (22)
    • ►  November (2)
    • ►  October (4)
    • ►  September (5)
    • ►  August (2)
    • ►  July (1)
    • ►  June (1)
    • ►  May (2)
    • ►  April (1)
    • ►  March (1)
    • ►  February (2)
    • ►  January (1)
  • ►  2012 (31)
    • ►  December (4)
    • ►  October (3)
    • ►  September (8)
    • ►  July (1)
    • ►  June (1)
    • ►  May (14)
  • ►  2010 (9)
    • ►  July (3)
    • ►  June (2)
    • ►  April (1)
    • ►  March (2)
    • ►  February (1)
  • ►  2009 (4)
    • ►  February (2)
    • ►  January (2)

recent posts

Pinterest Board

Popular Posts

Liebster Award

Liebster Award

Very Good Recipes

Very Good Recipes

You can find my recipes on Very Good Recipes

Contact Us

Name

Email *

Message *

Pages

  • Travelogue Index
  • VEGETARIAN RECIPE
  • CHICKEN RECIPES
  • SEAFOOD RECIPES
  • MUTTON RECIPES
  • RICE RECIPES
  • EGG RECIPES
  • DAAL RECIPES
  • ROTI & PARATHA RECIPES
  • BAKING RECIPES
  • SWEET RECIPES
  • SNACKS RECIPES
  • SIDES RECIPES
  • SOUP RECIPES
  • SALAD & BOWLS RECIPES
  • ROASTED RECIPIES
  • JAM & PRESERVE RECIPES
  • BEVERAGE RECIPES
  • SAUCES, SPICES & CURRY BASE RECIPES
  • CHUTNEY & DIPS RECIPES
  • FESTIVE RECIPES
  • Contact Us
  • TRAVELOGUES OF EAST INDIA
  • TRAVELOGUES OF WEST INDIA
  • TRAVELOGUES OF SOUTH INDIA
  • TRAVELOGUES OF NORTH INDIA
  • TRAVELOGUES of ASIA
  • North East Recipe

This Blog is protected by DMCA.com

DMCA.com for Blogger blogs
FOLLOW ME @INSTAGRAM

Curries n Stories © 2020 All rights reserved.
Created with by BeautyTemplates